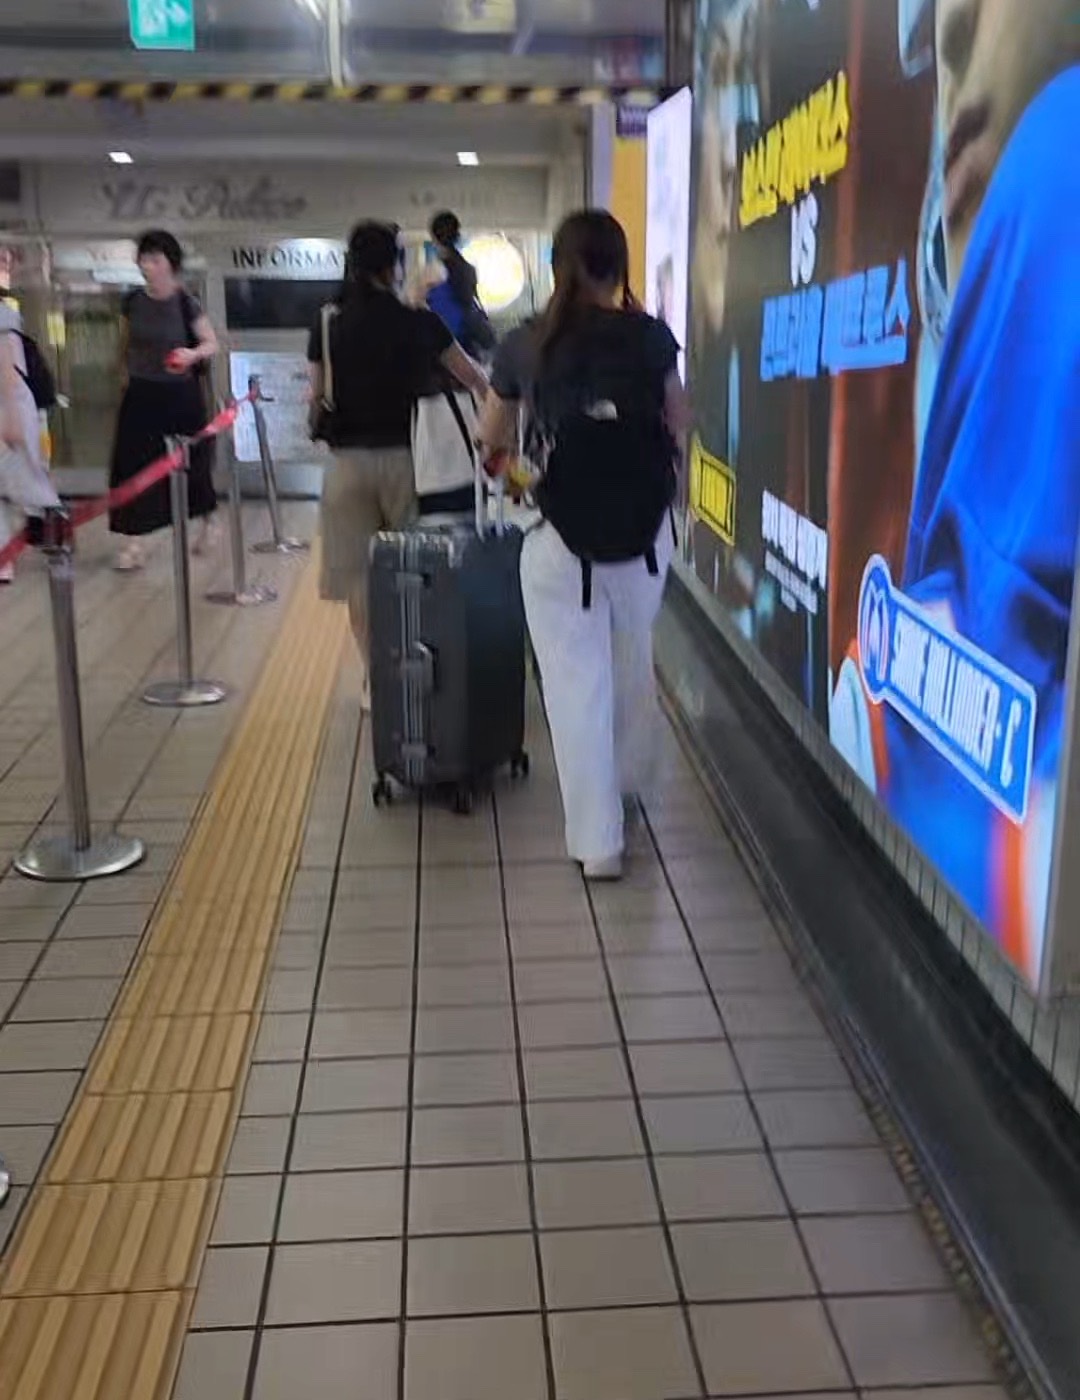
This guide is written in two parts. English first, Korean below. 이 글은 두 파트로 되어 있습니다. 영문이 먼저, 한국어가 아래에 있습니다.
PART 1 — ENGLISH
Most guides tell you Seoul has free transfers between bus and subway. True, and not enough to actually use it.
The rules have four numbers, and one of them — the night-time extension — is missing from nearly every English explanation. It is also the one most likely to save a visitor money, because visitors are out late.
1. The four numbers
Rule
Value
Transfer window, daytime
30 minutes from tapping out
Transfer window, 21:00–07:00
60 minutes
Transfers allowed
4 (five rides total)
Added fare beyond the base zone
₩100 per 5 km
The window is measured from when you tap out of the first vehicle to when you tap into the next one — not from when you board the first.
That is worth sitting with. It means the clock starts when you leave, and the 30 minutes belongs to you: walking, waiting for a bus, browsing a shop between legs. You do not have to rush the connection itself.
The night extension doubles that to an hour between 9pm and 7am. If your route is subway to bus after dinner, you have far more room than the daytime rule suggests.
2. What actually breaks it
Failing to tap out. This is the one that costs people, and it is specific to buses — the subway gate will not open unless you tap, so you cannot forget. On a bus you can simply walk off.
Miss the tap-out and the chain breaks: your next ride is charged as a fresh journey, and there are further consequences for repeat misses. That is covered in the tap-out guide.
Using a different card. The discount follows the card, not the person. One card per person, and the same card for the whole chain. Paying one leg in cash breaks it too.
Transferring on the same line. Getting off and back on the same bus route, or the same subway line, does not count. The system reads it as one continuing trip and there is nothing to discount.
Letting the window lapse. Thirty minutes is generous, but a long meal is not a transfer.
3. What counts as one journey
The transfer system covers more than people assume:
Seoul, Incheon and Gyeonggi buses
Seoul Metro, Korail lines, Incheon Metro and regional rail
GTX-A and the Han River Bus
So a bus in Gyeonggi to a Seoul subway to another bus is a single chain, provided you stay inside the window and use the same card.
Four transfers means five rides on one fare basis — more than most trips need, so in practice the limit that binds is the clock, not the count.
4. The distance part people misread
The transfer being “free” is not quite it. Seoul’s fare is distance-based: a base fare covers the first 10 km, and beyond that you pay ₩100 per 5 km.
What the transfer discount removes is the second base fare — the flat charge you would otherwise pay for boarding again. The distance component still accrues across the whole chain.
So a short transfer really is close to free. A transfer that takes you 20 km further is not, and that is not a malfunction.
5. Using it on purpose
A few things follow from the rules that are worth doing deliberately:
Break a journey rather than force a direct route. If the direct option is awkward, two legs with a transfer costs little more than one, so route by convenience rather than by connection count. (With luggage this reverses — see transfer distances.)
Use the 30 minutes. Pick something up between legs. The window is dwell time, not a countdown to sprint against.
After 9pm, plan on an hour. This is the practical takeaway. A subway ride, dinner nearby, then a bus home can sit inside one fare chain if you keep it under 60 minutes.
Always tap out on buses. Everything above depends on it.
6. Before you ride
The window is 30 minutes from tap-out, 60 minutes between 21:00 and 07:00
It is measured from tapping out, not from boarding
Four transfers are allowed — five rides in one chain
Tap out on buses. Missing it breaks the chain and costs you twice
One card per person, and the same card throughout. Cash breaks it
Same-line transfers do not count
Buses, subway, Korail, GTX-A and the Han River Bus all participate
Beyond the base zone you still pay ₩100 per 5 km — the discount removes the second base fare, not the distance
PART 2 — 한국어
대부분의 안내가 서울은 버스와 지하철 사이 환승이 무료라고 말합니다. 맞는 말이지만, 실제로 활용하기에는 부족합니다.
규칙에는 숫자가 네 개 있고, 그중 하나 — 심야 연장 — 는 영문 설명 거의 어디에도 없습니다. 그런데 하필 방문자에게 가장 도움이 되는 항목입니다. 여행자는 늦게까지 돌아다니니까요.
1. 숫자 네 개
규칙
값
환승 인정 시간 (주간)
하차 태그 후 30분
환승 인정 시간 (21:00~07:00)
60분
인정 횟수
4회 (총 5회 승차)
기본 거리 초과분
5km당 100원
기준은 먼저 탄 차에서 하차 태그한 시각부터 다음 차에 승차 태그하는 시각까지입니다. 처음 탄 시각이 아닙니다.
이 차이가 큽니다. 시계는 내릴 때 시작하고, 그 30분은 온전히 내 것입니다. 걷든, 버스를 기다리든, 중간에 가게를 들르든 상관없습니다. 환승 자체를 서두를 필요가 없습니다.
심야에는 이게 한 시간으로 늘어납니다. 저녁 먹고 지하철에서 버스로 갈아탄다면, 주간 규칙이 시사하는 것보다 훨씬 여유가 있습니다.
2. 실제로 끊기는 경우
하차 태그를 안 했을 때. 사람들이 실제로 손해 보는 지점이고, 버스에만 해당합니다. 지하철은 태그하지 않으면 문이 안 열려서 잊을 수가 없습니다. 버스는 그냥 내릴 수 있습니다.
하차 태그를 놓치면 연결이 끊겨 다음 승차가 새 여정으로 계산되고, 반복되면 추가 불이익도 있습니다. 하차 태그 안내에 정리했습니다.
다른 카드를 썼을 때. 할인은 사람이 아니라 카드를 따라갑니다. 1인 1카드이고, 한 여정 내내 같은 카드여야 합니다. 한 구간을 현금으로 내도 끊깁니다.
같은 노선으로 갈아탈 때. 같은 버스 노선이나 같은 지하철 노선에 다시 타는 건 환승으로 보지 않습니다. 이어지는 하나의 통행으로 읽혀서 할인할 대상이 없습니다.
시간을 넘겼을 때. 30분은 넉넉하지만 긴 식사는 환승이 아닙니다.
3. 하나의 여정으로 묶이는 범위
생각보다 넓습니다.
서울·인천·경기 버스
서울 지하철, 코레일 노선, 인천 지하철, 광역철도
GTX-A, 한강버스
즉 경기도 버스 → 서울 지하철 → 다른 버스가 하나의 사슬로 묶입니다. 시간 안에 있고 같은 카드를 쓴다면요.
4회 환승은 하나의 요금 기준으로 5회 승차라는 뜻입니다. 웬만한 이동에는 남는 숫자라, 실제로 발목을 잡는 건 횟수가 아니라 시간입니다.
4. 거리 부분을 오해하기 쉽습니다
환승이 “무료”라는 말은 정확하지 않습니다. 서울 요금은 거리 비례입니다. 기본요금이 처음 10km를 덮고, 그 뒤로는 5km당 100원이 붙습니다.
환승 할인이 없애주는 건 두 번째 기본요금입니다. 다시 탈 때 원래 내야 할 기본 요금이죠. 거리에 따른 부분은 사슬 전체에 걸쳐 계속 쌓입니다.
그래서 짧은 환승은 실제로 거의 공짜입니다. 20km를 더 가는 환승은 아니고, 그건 오작동이 아닙니다.
5. 의식적으로 활용하기
규칙에서 따라 나오는, 일부러 해볼 만한 것들입니다.
직행을 억지로 찾기보다 여정을 끊으세요. 직행이 불편하다면 환승 한 번 낀 두 구간이 한 번보다 크게 비싸지 않습니다. 연결 횟수가 아니라 편의로 경로를 고르면 됩니다. (짐이 있으면 반대입니다. 환승 거리 참고.)
30분을 쓰세요. 구간 사이에 뭘 사도 됩니다. 이 시간은 뛰어야 할 카운트다운이 아니라 머무를 수 있는 시간입니다.
밤 9시 이후에는 한 시간으로 잡으세요. 실질적인 요령은 이겁니다. 지하철로 이동하고, 근처에서 저녁을 먹고, 버스로 돌아오는 게 60분 안이면 하나의 요금 사슬에 들어갑니다.
버스에서는 반드시 하차 태그. 위의 모든 것이 여기에 달려 있습니다.
6. 타기 전에
인정 시간은 하차 태그 후 30분, 21:00~07:00에는 60분
기준은 하차 태그 시각이지 승차 시각이 아닙니다
4회 환승, 즉 한 사슬에 5회 승차까지
버스에서 하차 태그. 놓치면 사슬이 끊기고 두 번 냅니다
1인 1카드, 처음부터 끝까지 같은 카드. 현금이 끼면 끊깁니다
같은 노선 환승은 인정되지 않습니다
버스·지하철·코레일·GTX-A·한강버스가 모두 포함됩니다
기본 거리를 넘으면 5km당 100원은 그대로 붙습니다. 할인은 두 번째 기본요금을 없애는 것이지 거리를 없애는 게 아닙니다
This guide is written in two parts. English first, Korean below. 이 글은 두 파트로 되어 있습니다. 영문이 먼저, 한국어가 아래에 있습니다.
PART 1 — ENGLISH
Your app says the trip takes 38 minutes with one transfer. Another route takes 41 minutes with none.
You take the 38. Then you spend six minutes walking through a tunnel with a suitcase, and arrive later than the other route would have got you there.
Seoul transfer distances range from about 200 metres to 414 metres, and no mainstream routing app shows you which one you are about to walk. The minute estimate absorbs the walk into a single number, so a long transfer and a short one look identical on screen.
Here is which ones are long, and when it changes your decision.
1. The numbers
Measured transfer corridors at the stations visitors actually use (Hyundai Rotem):
Station
Transfer
Distance
On foot
Hongik Univ.
Line 2 ↔ Gyeongui-Jungang
414 m
~5 min 45 s
Seoul Station
Line 1 ↔ Airport Railroad
365 m
~5 min
Hongik Univ.
Line 2 ↔ Airport Railroad
355 m
~5 min
Express Bus Terminal
Line 7 ↔ Line 9
314 m
~4 min 20 s
Jongno 3-ga
Line 1 ↔ Line 5
312 m
~4 min 20 s
Nowon
Line 4 ↔ Line 7
278 m
~3 min 52 s
Jamsil
—
about 200 m
for comparison
Hongik Univ. Station has the longest transfer in the network — and it is the station most visitors arrive at from Incheon Airport, on the day they are carrying the most.
Those times assume you walk briskly and unencumbered. With a large suitcase, in a crowd, add to them.
2. Why the app cannot tell you
Routing apps optimise for total minutes. A transfer is priced into that number as walking time, so a 414-metre transfer and a 200-metre one both just make the total slightly larger.
What the number cannot express:
Whether the walk includes stairs or only escalators
Whether you will be dragging luggage the whole way
Whether it is a single corridor or several level changes
How it feels at rush hour, when the corridor is as crowded as the train
None of that is in “38 min”. Two routes with identical estimates can be very different experiences.
3. When it actually changes your decision
Most of the time, do not think about it. A few minutes of walking is not worth planning around when you are unencumbered.
It matters in four situations:
Carrying a large suitcase. This is the big one. A 400-metre corridor with a checked-size case is meaningfully harder than the same distance empty-handed, and if there are stairs it is worse. Prefer the route with fewer changes even if the estimate is a little longer. More in taking luggage on Seoul transport.
Tight connection to a flight or KTX. The estimate assumes you make the walk at normal pace. If you are cutting it fine, a long transfer eats the buffer you thought you had.
Mobility limits, or travelling with small children. The distance is the same but the cost is not, and lift routes are often longer than the walking route.
Late at night. Trains run less often, so missing one because the transfer took longer than you expected costs more than a few minutes.
4. What to do instead
There is no app that ranks routes by transfer comfort, so the practical substitutes are these.
Count transfers, not just minutes. A direct route at 41 minutes usually beats a one-change route at 38 when you are loaded. This single habit handles most cases.
Recognise the long ones. If your route passes through Hongik Univ., Seoul Station, Express Bus Terminal or Jongno 3-ga and involves a change there, assume five minutes of walking rather than two.
At Hongik Univ. specifically, check whether you need to transfer at all. The Airport Railroad and Gyeongui-Jungang platforms have their own street exits — numbers 3 to 7. If your destination is on that side you can leave from there and skip the corridor entirely. That station is covered in detail in our guide to its layout.
Use Naver Map for the exit number. It gives exit numbers where Google Maps cannot give walking directions at all, and coming out of the right exit saves more time than any transfer choice.
5. One thing that works in your favour
Long transfers do not cost you money. Under Seoul’s integrated fare system, a transfer within the allowed window is a continuation of the same journey, not a new fare — and the window is generous enough that even a 414-metre walk does not threaten it.
This guide is written in two parts. English first, Korean below. 이 글은 두 파트로 되어 있습니다. 영문이 먼저, 한국어가 아래에 있습니다.
PART 1 — ENGLISH
Search this and you get the same reassurance everywhere: yes, you can take luggage on the Seoul subway, there is no rule against it.
That is true and it is not the useful answer. There is no size limit. The difficulty is not the rule — it is the building.
Three things actually cost you on the subway: ticket gates, transfer distances, and rush hour. And there is one mode — the ordinary city bus — where a real size limit does apply. Here is what to do about each.
1. The gate is the first problem
Standard ticket gates in Seoul are narrow — sized for a person, not a person plus a hard case beside them. Pushing a large suitcase through the standard gate means lifting it, angling it, or holding up the queue behind you.
Use the wide gate instead. Every station has at least one, marked for wheelchairs, prams and mobility-impaired passengers. Luggage is a legitimate use — it is the same gate, it just opens wider.
It is usually at the end of the row of gates, often beside the staffed booth, and marked with a wheelchair symbol. You tap your card exactly the same way.
This one change removes most of the friction people describe at gates.
2. Distance, not stairs, is what tires you
Seoul stations are large, and transfers can be long. The one that catches travellers hardest is at Hongik Univ. Station, where the Line 2 ↔ Airport Railroad transfer is 355 metres — and that is the station most visitors arrive at from the airport.
Station
Transfer
Distance
Hongik Univ.
Line 2 ↔ Gyeongui-Jungang
414 m
Seoul Station
Line 1 ↔ AREX
365 m
Hongik Univ.
Line 2 ↔ AREX
355 m
Express Bus Terminal
Line 7 ↔ Line 9
314 m
Jongno 3-ga
Line 1 ↔ Line 5
312 m
Check the number of transfers before you check the total journey time. A route that is five minutes faster but adds a transfer is usually slower with a suitcase, and considerably less pleasant.
Naver Map will show you the route options; picking the one with fewer changes is a decision the app will not make for you.
3. Lifts exist, but not everywhere you want them
Every station has at least one lift. The catch is that older stations may have only one, positioned at one specific exit — not necessarily the exit you want.
What this means in practice: you can almost always get from platform to street without stairs, but you may come out several hundred metres from where you intended.
Escalators are more widespread than lifts but often run in one direction only, and that direction changes by time of day.
Moving walkways cover some of the longest passages. They are worth looking for — but like escalators, they usually run one way.
If stairs are genuinely not an option for you, plan the route in advance rather than improvising at the platform. Seoul Metro publishes station-by-station facility data — lifts, escalators, moving walkways, wheelchair lifts — through the Seoul Metropolitan Government’s accessibility pages.
4. Rush hour is a real constraint
There is no rule barring luggage at any hour. There is, however, a practical reality: on Line 2 between roughly 08:00–09:30 and 18:00–19:30, carriages fill to the point where a large suitcase is genuinely difficult to place and genuinely unwelcome.
This is not about etiquette lectures. It is that you will spend the journey holding a case upright in a crowd, and that is a bad twenty minutes.
Shift by an hour if you can. If you cannot, stand in the space beside the doors at the carriage ends rather than mid-carriage, and keep the case in front of you rather than beside you.
5. What is actually banned
One rule did change recently, and it is worth knowing because it catches people out.
Since July 1, 2026, Seoul Metro prohibits lithium batteries above 160Wh and personal mobility devices — e-scooters, e-bikes, electric skateboards, electric unicycles — from stations and trains (Seoul Metro, via Wikitree).
Ordinary luggage is not affected. Neither are phones, tablets or normal power banks, which sit well under the threshold. Wheelchairs and mobility aids are exempt.
If you were planning to bring a rented e-scooter into a station, that is the thing that changed.
6. The one mode that really does restrict you
Everything above is about the subway, where no size limit applies. City buses are different, and this catches people out.
Seoul’s city bus terms of carriage cap a passenger’s carry-on at under 20 kg and within 50 × 40 × 20 cm — roughly a 17–18 inch cabin bag. A checked-size suitcase is over the limit, and a driver may refuse to let you board. It has happened often enough to generate complaints in the Korean press.
Enforcement is at the driver’s discretion and varies with how full the bus is, so plenty of people board with larger cases without incident. But you cannot rely on it, and being turned away at the door with a bus queue behind you is a bad way to find out.
What this means in practice:
Mode
Large suitcase
Subway
No size limit
Airport bus
Fine — it has a luggage hold underneath
City bus
Over 50 × 40 × 20 cm is above the stated limit
Taxi
Fine
So the answer to “how am I supposed to get around with a suitcase” is: subway, airport bus, or taxi. The ordinary city bus is the one mode where a full-size case is a genuine problem, and it is also the one most guides never mention.
Airport buses are a different service with under-floor luggage compartments — see our airport transfer guide.
7. The alternative: do not carry it
The strongest move is often not to solve the luggage problem but to remove it.
Storage — subway lockers take app bookings and start around ₩2,200 for four hours. Staffed desks cost more but take oversized cases.
Delivery — the staffed T-Luggage desks will send your bag to another subway station or to Incheon Airport rather than holding it for pickup. On a departure day this can mean never touching your suitcase between the hotel and the airport.
There is no size limit on luggage in the Seoul subway
Use the wide gate at the end of the gate row — it is the single biggest improvement
Count transfers, not just minutes. Fewer changes beats a faster route
The Hongik Univ. transfer runs 355–414 m depending on the line — plan for it if arriving from the airport
Every station has a lift, but older ones have only one, at one exit
Avoid Line 2 at 08:00–09:30 and 18:00–19:30 if you can
Stand beside the doors at carriage ends, case in front of you
Lithium batteries over 160Wh and e-scooters are banned since July 2026 — ordinary luggage is fine
City buses cap carry-on at 50 × 40 × 20 cm — a checked-size case is over it. Subway, airport bus and taxi are fine
Consider storing or shipping the bag instead of moving it
PART 2 — 한국어
검색하면 어디서나 같은 답이 나옵니다. 네, 서울 지하철에 짐 갖고 탈 수 있습니다, 금지 규정 없습니다.
맞는 말이지만 쓸모 있는 답은 아닙니다. 크기 제한은 없습니다. 힘든 건 규정이 아니라 건물입니다.
지하철에서 실제로 대가를 치르는 건 세 가지입니다. 개찰구, 환승 거리, 그리고 혼잡 시간. 그리고 진짜 크기 제한이 있는 수단이 하나 있습니다. 일반 시내버스입니다. 각각 어떻게 대응할지 정리했습니다.
1. 개찰구가 첫 관문입니다
서울의 일반 개찰구는 좁습니다. 사람 한 명 기준이지 사람 옆에 캐리어까지 감안한 폭이 아닙니다. 큰 캐리어를 일반 개찰구로 밀어 넣으려면 들어 올리거나 비스듬히 세우거나, 뒷사람을 세워두게 됩니다.
대신 넓은 개찰구를 쓰세요. 모든 역에 최소 하나는 있고, 휠체어·유아차·교통약자용으로 표시돼 있습니다. 짐을 든 경우도 정당한 사용입니다. 같은 개찰구이고 폭만 넓습니다.
보통 개찰구 줄 맨 끝, 역무실 옆에 있고 휠체어 표시가 붙어 있습니다. 카드 대는 방식은 똑같습니다.
이것 하나만 바꿔도 개찰구에서 겪는 불편은 대부분 사라집니다.
2. 지치게 만드는 건 계단이 아니라 거리입니다
서울의 역은 크고 환승이 깁니다. 여행자를 가장 세게 치는 곳이 홍대입구역인데, 2호선 ↔ 공항철도 환승이 355m입니다. 하필 공항에서 오는 방문자 대부분이 도착하는 역입니다.
역
환승
거리
홍대입구
2호선 ↔ 경의중앙선
414 m
서울역
1호선 ↔ 공항철도
365 m
홍대입구
2호선 ↔ 공항철도
355 m
고속터미널
7호선 ↔ 9호선
314 m
종로3가
1호선 ↔ 5호선
312 m
총 소요시간보다 환승 횟수를 먼저 보세요. 5분 빠른데 환승이 하나 더 있는 경로는 캐리어가 있으면 대개 더 느리고 훨씬 피곤합니다.
네이버지도가 경로 후보를 보여주지만, 환승이 적은 쪽을 고르는 판단은 앱이 대신해 주지 않습니다.
3. 엘리베이터는 있지만 원하는 자리에 있진 않습니다
모든 역에 엘리베이터가 최소 하나는 있습니다. 문제는 오래된 역은 하나뿐이고, 특정 출구 쪽에 있다는 점입니다. 내가 나가려던 출구가 아닐 수 있습니다.
실제로는 이런 뜻입니다. 승강장에서 지상까지 계단 없이 갈 수는 거의 항상 있지만, 원하던 곳에서 수백 미터 떨어진 데로 나올 수 있습니다.
에스컬레이터는 엘리베이터보다 흔하지만 한 방향으로만 운행하는 경우가 많고, 그 방향이 시간대에 따라 바뀝니다.
가장 긴 통로 구간에는 무빙워크가 있습니다. 찾아볼 만하지만, 에스컬레이터와 마찬가지로 대개 한 방향입니다.
계단이 정말 어려운 상황이라면 승강장에서 즉흥적으로 찾지 말고 미리 경로를 짜세요. 서울교통공사가 역별 시설 현황(엘리베이터·에스컬레이터·무빙워크·휠체어리프트)을 공개합니다(서울시 지하철 편의시설 안내).
4. 혼잡 시간은 실질적인 제약입니다
시간대별로 짐을 막는 규정은 없습니다. 다만 현실이 있습니다. 2호선 기준 대략 08:00~09:30, 18:00~19:30에는 객차가 큰 캐리어를 놓을 자리 자체가 없을 만큼 찹니다.
예절 설교를 하려는 게 아닙니다. 그 시간에 타면 인파 속에서 캐리어를 세워 붙들고 가야 하고, 그건 20분 내내 괴롭습니다.
한 시간만 비켜도 다릅니다. 어쩔 수 없다면 객차 중앙이 아니라 양 끝 출입문 옆 공간에 서고, 캐리어를 옆이 아니라 몸 앞에 두세요.
5. 실제로 금지된 것
최근에 규정이 하나 바뀌었고, 걸리는 사람이 있어 알아둘 만합니다.
2026년 7월 1일부터 서울교통공사는 160Wh를 넘는 리튬배터리와 개인형 이동장치 — 전동킥보드, 전기자전거, 전동보드, 전동휠 — 의 역사·열차 반입을 금지합니다(서울교통공사, 위키트리 보도).
일반 짐은 해당 없습니다. 휴대폰·태블릿·일반 보조배터리도 기준을 한참 밑돕니다. 휠체어와 보조기구는 예외입니다.
대여한 전동킥보드를 역에 들고 들어갈 생각이었다면, 바뀐 건 그겁니다.
6. 정말로 제한이 있는 수단 하나
여기까지는 지하철 이야기이고, 지하철에는 크기 제한이 없습니다. 시내버스는 다릅니다. 그리고 여기서 많이들 걸립니다.
서울 시내버스 운송약관은 승객 휴대품을 20kg 미만, 50 × 40 × 20cm 이내로 정하고 있습니다. 대략 17~18인치 기내용 캐리어 크기입니다. 위탁수하물 크기의 캐리어는 규정상 초과이고, 기사가 승차를 거부할 수 있습니다. 실제로 거부당했다는 민원이 언론에 보도될 만큼 일어납니다.
적용은 기사 재량이고 버스가 얼마나 붐비느냐에 따라 달라져서, 큰 캐리어로 별일 없이 타는 경우도 많습니다. 다만 기대할 수는 없고, 뒤에 줄이 선 상태로 문 앞에서 알게 되는 건 곤란합니다.
실제로는 이런 뜻입니다.
수단
대형 캐리어
지하철
크기 제한 없음
공항버스
문제없음 — 하부 짐칸이 있습니다
시내버스
50 × 40 × 20cm 초과는 규정 기준을 넘습니다
택시
문제없음
그러니 “캐리어 들고 어떻게 다니라는 건가”에 대한 답은 지하철·공항버스·택시입니다. 일반 시내버스가 대형 캐리어에 진짜 문제가 되는 유일한 수단이고, 하필 대부분의 안내가 언급하지 않는 부분입니다.
This guide is written in two parts. English first, Korean below. 이 글은 두 파트로 되어 있습니다. 영문이 먼저, 한국어가 아래에 있습니다.
PART 1 — ENGLISH
You land at Incheon, take the Airport Railroad, and get off at Hongik Univ. Station because your hotel is in Hongdae. The map says you are there.
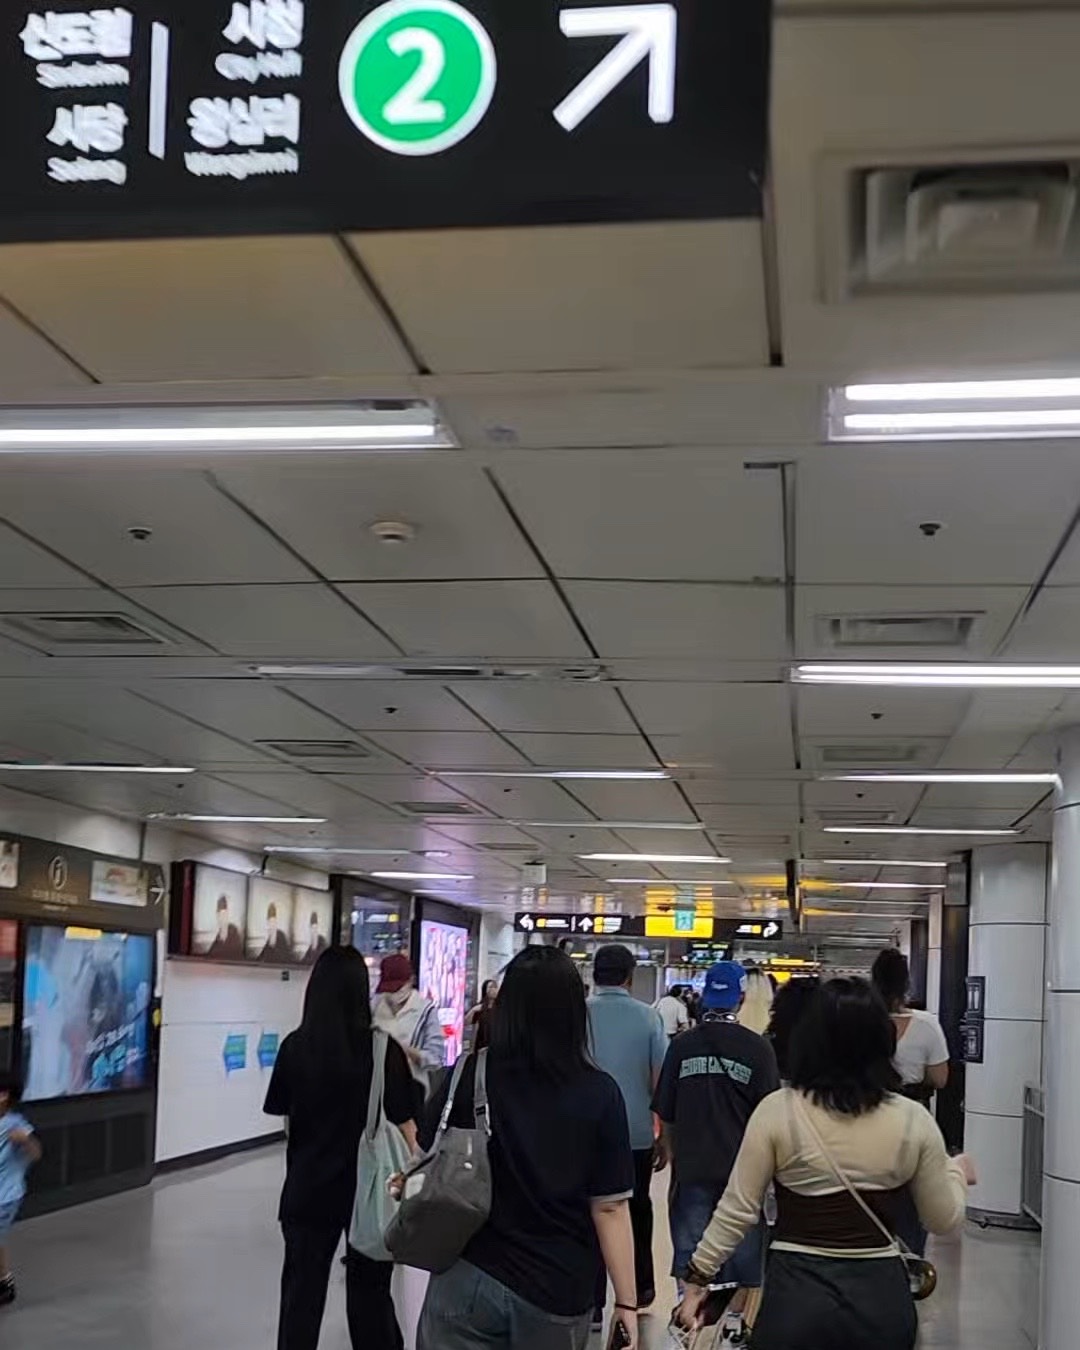
Then you need Line 2, and you walk. And keep walking.
The transfer between the Airport Railroad and Line 2 here is 355 metres. Between the Gyeongui-Jungang Line and Line 2 it is 414 metres — the longest transfer in the Seoul network. Nobody tells you this, and it lands on the exact day you are dragging the most luggage you will carry on the whole trip.
Here is how the station is actually laid out, and how to avoid the walk entirely.
1. Why it is so far
Hongik Univ. Station is not one station. It is three, sharing a name.
Line
Code
Where it sits
Seoul Metro Line 2
239
Yanghwa-ro / Seogyo-ro junction, toward Hongik University
Airport Railroad (AREX)
A03
Donggyo-dong Samgeori, toward Yeonnam-dong
Gyeongui-Jungang Line
K314
Same building as AREX
Line 2 was built where the university is. The Airport Railroad and Gyeongui-Jungang line were built decades later, near a different intersection several hundred metres away. They were then connected underground and given one name.
That connection is the 355m you walk.
For comparison, the long transfers people complain about in Seoul are shorter than this one:
Station
Transfer
Distance
On foot
Hongik Univ.
Line 2 ↔ Gyeongui-Jungang
414 m
~5 min 45 s
Seoul Station
Line 1 ↔ AREX
365 m
~5 min
Hongik Univ.
Line 2 ↔ AREX
355 m
~5 min
Express Bus Terminal
Line 7 ↔ Line 9
314 m
~4 min 20 s
Jongno 3-ga
Line 1 ↔ Line 5
312 m
~4 min 20 s
Jamsil
—
about 200 m
for comparison
Budget about five minutes walking it unencumbered. With a large suitcase, more.
355 metres of this. It is flat and well lit, which is the good news; it is also the walk you make on the day you are carrying the most.
The one mercy: it is nearly flat. The route passes only a short escalator rather than long stair flights, so the distance is the problem, not the climb.
2. How to avoid it
If your hotel is in Hongdae, you may not need Line 2 at all.
This is the part that saves people the most time. The Airport Railroad and Gyeongui-Jungang platforms have their own exits — numbers 3 to 7 — which come up at street level near Donggyo-dong Samgeori. If your destination is on that side, walk out there and skip the transfer completely.
Line 2’s exits are 1, 2, 8 and 9, and they come up near the university.
So the question is not “how do I transfer” but “which end of the station do I actually want?” Check your destination against the two exit groups before you start walking.
If you do need Line 2 — you are heading to Sinchon, Gangnam, Jamsil, or anywhere on the loop — then the 355m is unavoidable and you should simply plan for it.
3. What you walk past
The passage is not a bare tunnel. It is lined with shops, and most visitors go through it staring at their phone without noticing.
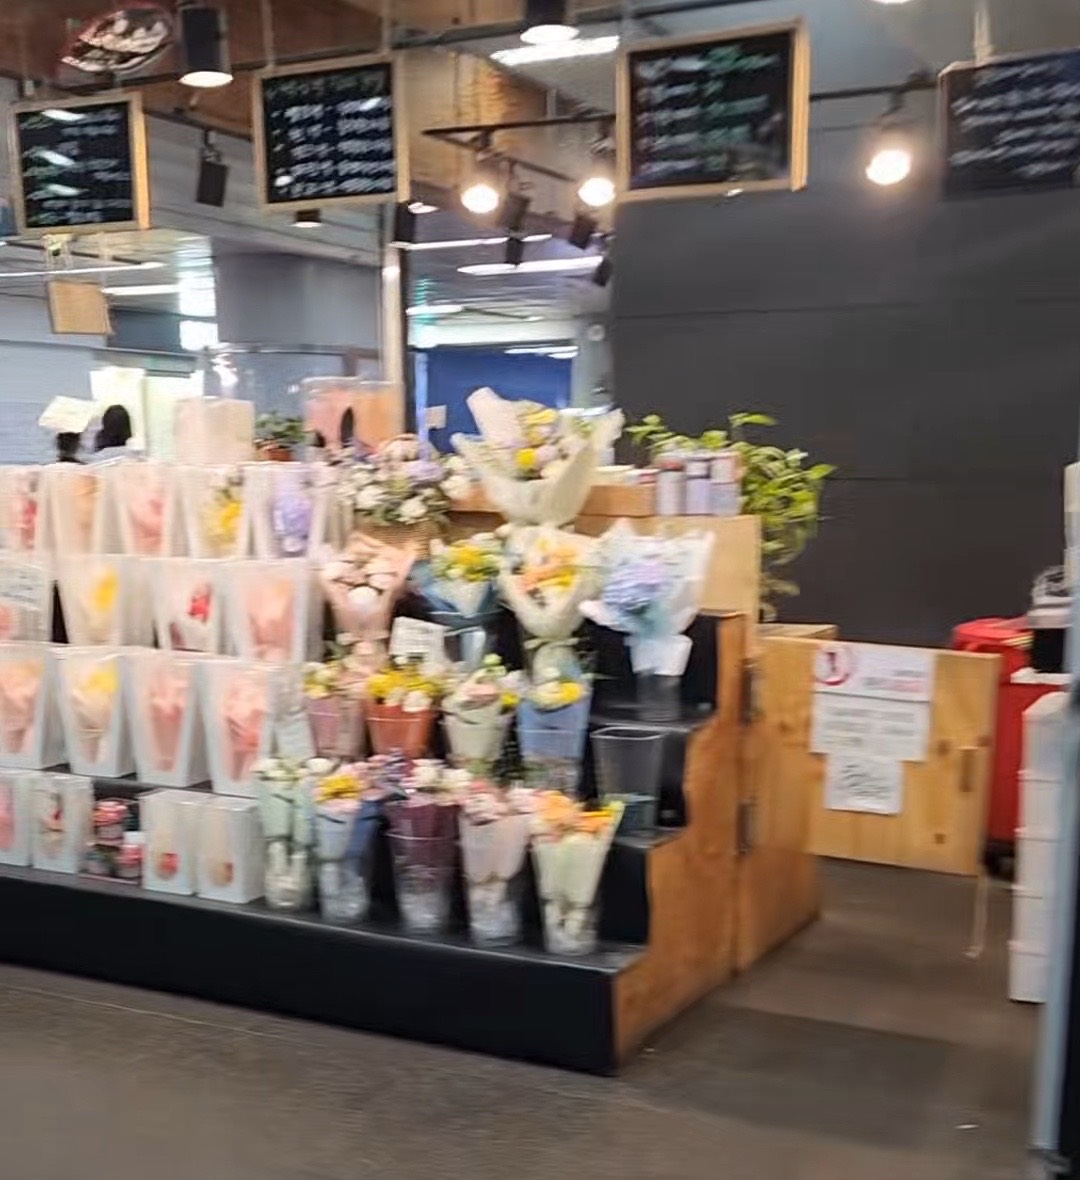
Along it you will find clothing and accessory stalls, snack counters — delimanjoo stalls are a fixture — a doughnut chain, and a flower shop, mixed in with the advertising screens. Prices on the clothing tend to sit below what the street-level shops in Hongdae charge, because the rent does.
Coming off the Gyeongui-Jungang line and heading for Exit 2, the route is simple: take the escalator down from the platform and keep walking. The shops begin right at the bottom of it.
Do not navigate by the shops themselves. Retail on this passage turns over — a snack restaurant that traded here has already closed. Any guide telling you to “turn at the doughnut place” is one closure away from being wrong. The escalator and the passage are the parts that stay put.
None of this is a destination. But if you are transferring anyway, or killing twenty minutes before a train, it is more interesting than a platform bench.
A practical note: these are small independent shops inside a transit passage. Card payment is normal but not universal, and hours follow the station rather than retail hours.
A flower stall on the passage. Shops like this sit along the transfer route, which is why the walk is less bleak than the distance suggests.
4. Exit 9, and why it is always packed
Exit 9 is the one that comes out at Hongdae’s main street, which means essentially every visitor uses it.
The station handles roughly 189,500 passengers a day across its three lines. A large share of those funnel toward one staircase.
Seoul has acknowledged the problem: a new Exit 8-1 is being built on the opposite side of the road from Exit 9, with escalators, specifically to relieve it. It is scheduled for 2028 (Seoul Metropolitan Government).
Until then, if Exit 9 is backed up, Exit 8 comes up nearby and is usually clearer. Exits 3 and 4 no longer exist — if you find them on an old map or blog post, ignore it.
5. If you are carrying luggage
The 355m transfer is the single strongest argument for not carrying your bags around Hongdae at all.
The staffed T-Luggage desk sits on B1, on the connecting passage toward the Airport Railroad — which is to say, directly on the route you are already walking. You can drop the case on the way through rather than making a special trip.
This guide is written in two parts. English first, Korean below. 이 글은 두 파트로 되어 있습니다. 영문이 먼저, 한국어가 아래에 있습니다.
PART 1 — ENGLISH
There is no shortage of “15 Korean etiquette rules” articles. The trouble is that they mix things you will encounter on your first afternoon with things you will never encounter at all.
You will not be handing anyone a business card. You will not be pouring soju for a senior colleague. You almost certainly will not be writing anyone’s name in red ink.
You will be trying to get a server’s attention, standing in a subway doorway, and wondering whether to tip.
So this is sorted by how often it will actually come up.
1. Things you will hit on day one
Ordering — look at the table first
Almost every guide tells you to press the call bell. That was the standard, and it is now one of four systems you might meet — and no longer the most common.
Check your table when you sit down. It tells you which one applies.
On the table
What to do
A tablet
Order on it yourself
A QR code
Scan it; the menu opens in your phone’s browser
A small button
Press it — staff come over
Nothing
Staff will come to you, or say “저기요” (jeo-gi-yo)
Table tablets are now widespread, especially in chains and busier restaurants. Many have a language button. Where they do, this is the easiest of the four for a visitor — you order without a word of Korean and without flagging anyone down.
One thing worth knowing: a QR menu opens in your ordinary browser, so your phone can translate the page. A tablet is an app and usually cannot be translated that way. If the tablet has no English and there is also a QR code, the QR is your better route.
What to unlearn is waiting to be noticed. Staff do not circle the room looking for eye contact. Whichever system the table uses, the first move is yours.
Do not tip
The price on the menu is what you pay. Restaurants, taxis, hotels — no tipping.
This is not a case of “tipping is optional.” Leaving money can create confusion, and staff may chase you down to return it. If you want to be polite, just say thank you.
(For what actually happens at the payment terminal — including the currency question that costs 3–7% — see paying by card in Korea.)
The subway is quiet
Phone calls, speakerphone, music without headphones — all read as inconsiderate. Carriages are noticeably quieter than in most cities and the contrast is what makes it stand out.
Your takeaway coffee can get you refused on a bus
This one has actual teeth, and almost no English guide mentions it.
On the subway the rule depends on where you are standing, and guides tend to flatten this into one sentence.
Inside the station, eating is normal. Concourses and transfer passages have snack counters and small restaurants, and people eat at them. The system sells you the food; nobody minds you eating it there. Benches before the gates are fair game too.
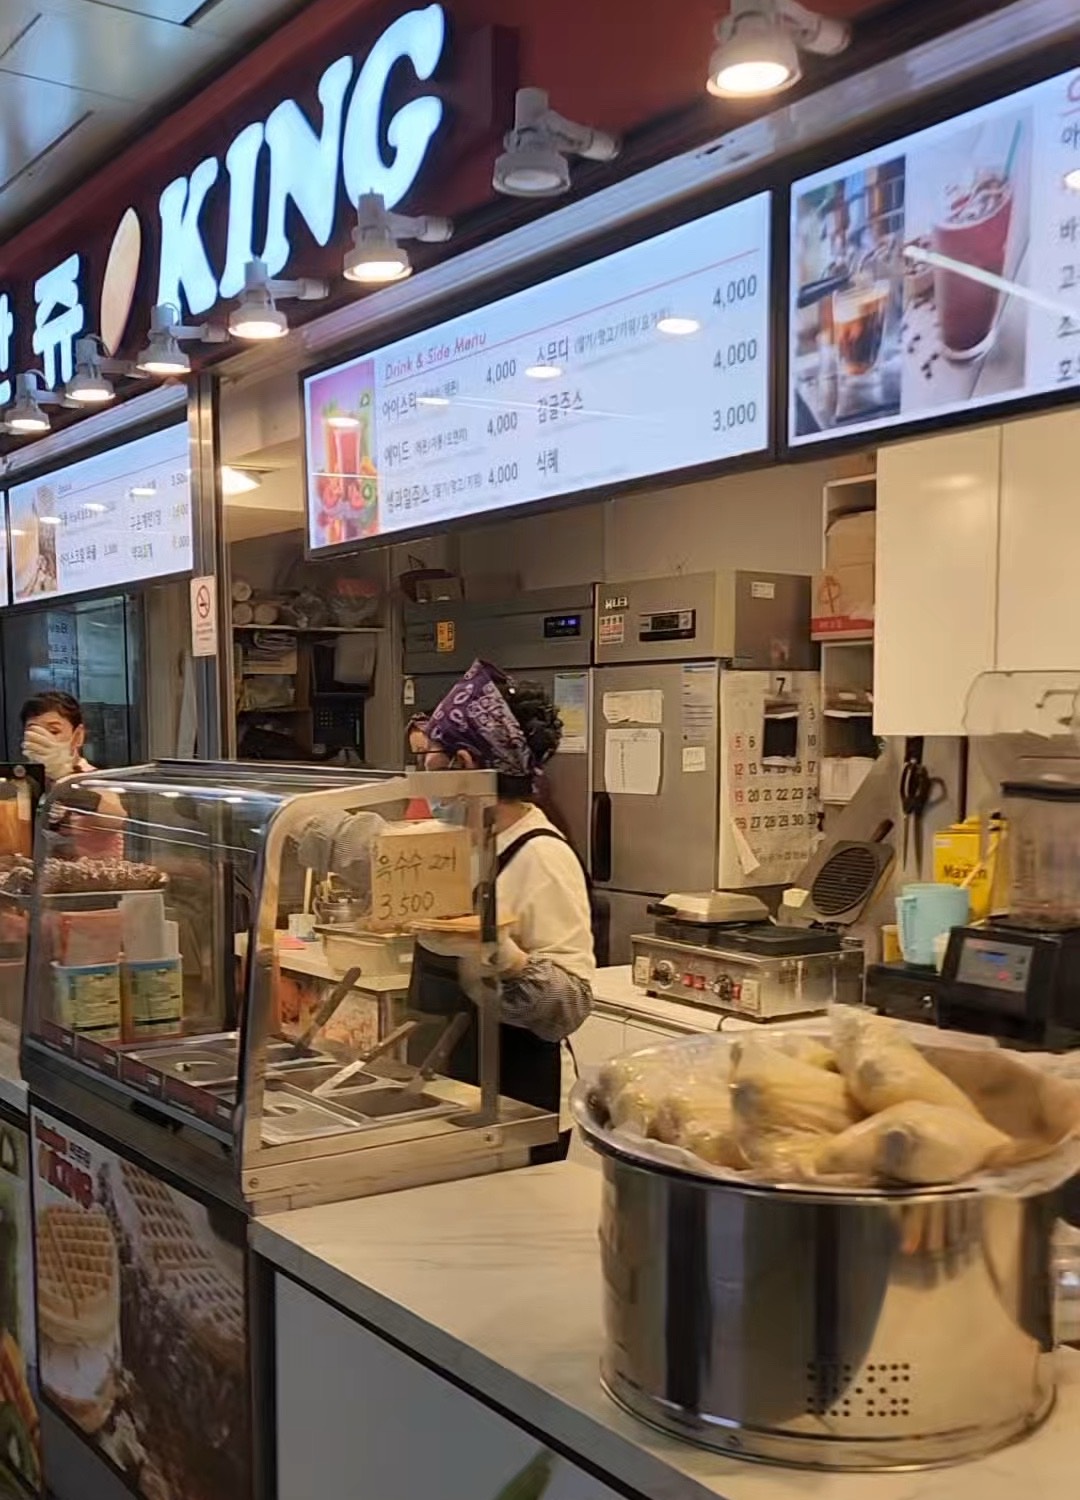
A snack counter inside the station: steamed corn, waffles, drinks, prices on the board. Eating here is unremarkable. Two minutes later, on the train, it would not be.
This is not a couple of vending machines. Stations carry chain coffee and doughnut outlets, and a few have burger places inside the gates. The small stalls selling delimanjoo, the little custard-filled corn cakes, are near-universal.
Most of these sit outside the ticket gates, in the concourse, so the safe default is: buy before you tap in.
Busier stations break that pattern. Some have outlets partway along the passages to the platforms, inside the paid area. Hongik Univ. Station is one of them. So it is worth a glance once you are through the gates rather than assuming you have missed your chance.
You can carry it through the gates and eat it on a platform bench. That is accepted — mildly conspicuous, perhaps, but nobody will stop you or say anything. There are three levels here, and only the last one is a real line:
Where
How it reads
Outside the gates
Completely normal
Platform bench, inside the gates
Fine. You may feel slightly watched
On the train
Not done
What actually decides the middle row is not a rule but how many people are around. A quiet platform, few others waiting, and you genuinely hungry — nobody minds, and Koreans treat that case as obviously fine. A packed platform at rush hour is a different situation, and a carriage is a different situation in any condition.
Which is the same instinct that governs most of this page: read the room rather than the rulebook.
The practical version is shorter than all of that. If you are hungry, eat at the station. It is set up for exactly this — buy before the gates, sit down, finish it, then board. Between the chain outlets and the delimanjoo stalls you will find something at almost any station, and it is cheap. Trying to eat on the move is the version that goes wrong.
Inside the carriage is different. A sealed bottle or closed tumbler is the practical limit. Eating is essentially not done — not an enforced ban with a fine, simply something nobody does, which is exactly what makes doing it conspicuous.
This tightened after COVID and has not loosened since. If you remember older accounts of people eating gimbap on the train, that era is over.
On buses the rule is stronger than manners. Under a Seoul city ordinance, a driver can refuse to let you board if you are carrying food in an open disposable container (Seoul Metropolitan Government).
Refused
Fine to carry
Takeaway coffee cup with a sip hole
Sealed plastic bottle
Tteokbokki or snacks in an open paper cup
Unopened can
Anything unwrapped or leaking
Closed tumbler or thermos
Chicken or pizza in a sealed box
Groceries in a bag
So the cup that was fine on the subway can stop you at the bus door. Finish it, or decant it into something with a lid, before you board.
Enforcement rests with the driver, so it varies — some wave you on. But being turned away is a real possibility, and arguing at the door with a queue behind you is not how you want to start the ride.
Do not sit in the priority seats
The clearly marked seats at the ends of each carriage are for elderly, pregnant and disabled passengers. They are often left empty even when the carriage is full. That is deliberate, not an oversight, and sitting there when you do not qualify is noticed.
Do not block the flow
Standing right in the doorway, stopping in a transfer corridor, pausing at the top of an escalator, hesitating at the ticket gate. None of these is a rule anyone will recite, but all of them create friction in a system built around moving quickly.
Step aside to check your phone.
Corridors are built for moving through. The yellow strip down the middle is tactile paving for blind passengers — a second reason not to stop on it.
2. Things that come up if you stay longer
Two hands
Giving or receiving something — money, a card, a drink, a document — with both hands, or one hand supported at the wrist by the other, reads as respectful. One hand is casual, and toward someone older or senior it reads as careless.
Worth adopting because it costs nothing and is noticed positively. Nobody will correct you for getting it wrong.
Pouring drinks
If you are drinking with Koreans: you pour for others, they pour for you. Pouring your own is the odd move. Hold the bottle with two hands when pouring for someone older.
This is real and comes up quickly in social settings — but only if you are drinking with locals rather than other travellers.
Shoes off
Homes, guesthouses, some traditional restaurants with raised floor seating, temple stays. If you see a step up and a shelf of shoes, that is the signal.
3. Things you will probably never encounter
Travel guides list these constantly. As a visitor on a short trip, most are not going to arise:
Frequently listed
Why it likely won’t apply
Business card etiquette
You are not exchanging cards on a holiday
Writing names in red ink
You will not be writing anyone’s name
Bowing depth and duration
A nod is fine; nobody expects choreography
Age-based speech levels
Handled by whoever speaks to you in English
Elaborate drinking rituals
Only if you end up out with locals — and then someone will guide you
“Cover your shoulders” dress advice
Widely repeated, and out of date in the districts you will actually spend time in
Mentioning these is not wrong — they are real parts of Korean social life. They are just not what your trip will consist of, and treating them as urgent crowds out the things that actually matter.
The rules are not the same everywhere
Most etiquette guides write about Korea as one place. It is not, and the gap between neighbourhoods is wider than the gap between countries in some of these lists.
In Hongdae, Hongik University’s district, the norms are about as loose as they get in Korea. It is a young, student and nightlife area, and visibly ignoring the conventions a guide warned you about draws no reaction at all. Dress is a clear example: advice to cover your shoulders circulates endlessly in English travel writing, and in a district like this it simply does not match what people around you are wearing.
The same behaviour reads differently in other settings. A temple, a traditional restaurant with older regulars, a rural town — these carry expectations Hongdae does not.
So the useful instinct is not a rulebook but a glance. Look at what people around you are doing and match it. That works in every district and saves you memorising which rules apply where.
4. The one that surprises people
Nobody expects you to know any of this.
Korea receives a lot of visitors, and staff in tourist areas deal with people who do not know the local norms every single day. Getting something wrong will not cause a scene.
More than that: a first mistake is almost always let go. Koreans are, as a rule, generous about this. Nobody is keeping score on a visitor who bows at the wrong moment, pours their own drink, or hands something over with one hand.
The line is not the rulebook. It is rudeness. Get a convention wrong and it passes without comment. Be dismissive of the person in front of you, take up space you have not been given, treat staff as scenery — that registers, and it would register anywhere. Almost everything short of that is absorbed without friction.
Which means the practical advice is to stop worrying about the list and start moving. Hesitating in a doorway while you try to remember a rule causes more friction than breaking the rule would have.
The subway and bus points are the ones worth internalising, because those affect other people or can actually stop you boarding. The rest is polish.
If you order the way your table is set up for, keep your voice down on the train, and skip the tip, you have covered most of it.
5. Quick list
Check the table to see how you order — tablet, QR code, call bell, or nothing. Do not wait for eye contact
No tipping, anywhere
Keep quiet on the subway — no calls, no speakerphone
Hungry? Eat at the station. Buy before the gates, sit down, finish it, then board — the carriage is sealed drinks only
An open takeaway cup can get you refused on a bus — finish it or seal it first
Leave the priority seats empty even when the carriage is full
Do not block doorways and corridors — step aside
Two hands when giving or receiving, especially to someone older
Do not pour your own drink in company
Shoes off where you see a step and a shoe shelf
Business cards, red ink, bowing angles — not your trip
A first mistake is almost always let go. The line is rudeness, not the rulebook
Norms vary sharply by district. Hongdae is among the loosest; temples and traditional restaurants are not
Match what people around you are doing. It beats memorising rules
PART 2 — 한국어
“한국 예절 15가지” 같은 글은 넘칩니다. 문제는 도착 첫날 마주칠 일과 평생 마주치지 않을 일이 섞여 있다는 점입니다.
여행자는 명함을 건넬 일이 없습니다. 상사에게 소주를 따를 일도 없습니다. 누군가의 이름을 빨간 펜으로 쓸 일은 거의 확실히 없습니다.
하지만 직원을 부르는 방법, 지하철 문 앞에 서 있는 것, 팁을 줘야 하나는 반드시 마주칩니다.
그래서 실제로 마주치는 빈도순으로 정리했습니다.
1. 첫날 바로 마주치는 것
주문 — 테이블부터 보세요
거의 모든 안내가 호출벨을 누르라고 합니다. 예전에는 그게 표준이었고, 지금은 마주칠 수 있는 네 가지 중 하나이며 더 이상 가장 흔한 방식도 아닙니다.
앉으면 테이블을 먼저 보세요. 어떤 방식인지 테이블이 알려줍니다.
테이블에 있는 것
할 일
태블릿
직접 주문합니다
QR 코드
찍으면 휴대폰 브라우저에 메뉴가 열립니다
작은 버튼
누르면 직원이 옵니다
아무것도 없음
직원이 오거나, “저기요” 하고 부릅니다
요즘은 테이블 주문 태블릿이 널리 퍼졌습니다. 특히 체인점과 붐비는 식당이 그렇습니다. 언어 버튼이 있는 경우가 많고, 있다면 방문자에게는 네 가지 중 가장 편합니다. 한국어 한마디 없이, 누구를 부르지 않고 주문이 끝납니다.
알아둘 점 하나. QR 메뉴는 일반 브라우저에서 열리므로 휴대폰의 번역 기능이 그대로 먹힙니다. 태블릿은 앱이라 그 방식으로 번역되지 않는 경우가 많습니다. 태블릿에 영어가 없는데 QR 코드도 함께 있다면 QR 쪽이 낫습니다.
버려야 할 습관은 알아봐 주기를 기다리는 것입니다. 직원이 눈을 마주치려고 돌아다니지 않습니다. 어떤 방식이든 먼저 움직이는 쪽은 손님입니다.
팁은 주지 않습니다
메뉴에 적힌 가격이 내는 돈의 전부입니다. 식당, 택시, 호텔 모두 팁이 없습니다.
“선택 사항”이 아닙니다. 돈을 두고 가면 혼란을 만들고, 직원이 돌려주려고 쫓아 나오기도 합니다. 고마움을 표하고 싶다면 인사말이면 충분합니다.
(계산대에서 실제로 일어나는 일 — 3~7%를 가져가는 통화 선택 질문 — 은 한국에서 카드 결제할 때에 정리했습니다.)
지하철은 조용합니다
통화, 스피커폰, 이어폰 없이 음악 재생은 배려 없는 행동으로 읽힙니다. 객차가 다른 도시들보다 눈에 띄게 조용해서 그 대비가 더 두드러집니다.
테이크아웃 커피 때문에 버스를 못 탈 수 있습니다
이건 실제로 강제력이 있는데도 영문 안내에 거의 나오지 않습니다.
지하철은 어디에 있느냐에 따라 다릅니다. 안내서들이 이걸 한 문장으로 뭉개는 경향이 있습니다.
역사 안에서 먹는 것은 자연스럽습니다. 대합실과 환승 통로에는 간식 코너와 작은 식당이 있고, 사람들이 거기서 먹습니다. 역이 음식을 팔고 있고, 그 자리에서 먹는 걸 아무도 문제 삼지 않습니다. 개찰구 앞 벤치도 마찬가지입니다.
역사 안의 간식 코너. 찐 옥수수, 와플, 음료, 가격표. 여기서 먹는 건 아무렇지 않습니다. 2분 뒤 열차 안이라면 다릅니다.
자판기 몇 대 얘기가 아닙니다. 역에는 커피·도넛 체인이 들어와 있고, 개찰구 안에 햄버거 가게가 있는 역도 더러 있습니다. 델리만쥬 매대는 거의 어느 역에나 있습니다.
다만 이런 가게들은 개찰구 밖에 있는 경우가 대부분입니다. 그래서 안전한 기본값은 하나입니다. 찍고 들어가기 전에 사세요.
붐비는 역은 이 패턴에서 벗어납니다. 승강장으로 가는 통로 중간, 즉 개찰구 안쪽에 가게가 있는 역들이 있습니다. 홍대입구역이 그런 곳입니다. 그러니 이미 들어왔다고 포기하지 말고 한 번 둘러보세요.
사서 개찰구 안으로 들고 들어와 승강장 벤치에서 먹어도 됩니다. 받아들여지는 행동입니다. 조금 눈치가 보일 수는 있지만 누가 막거나 뭐라 하지 않습니다. 단계가 셋 있고, 진짜 선은 마지막 하나뿐입니다.
어디
어떻게 읽히나
개찰구 밖
완전히 평범합니다
개찰구 안 승강장 벤치
괜찮습니다. 살짝 눈치가 보일 수는 있습니다
열차 안
하지 않습니다
가운데 칸을 실제로 가르는 건 규칙이 아니라 주변에 사람이 얼마나 있느냐입니다. 한산한 승강장에 기다리는 사람이 몇 없고 정말 배가 고픈 상황이라면 아무도 신경 쓰지 않습니다. 한국 사람들도 그 정도는 당연히 괜찮다고 여깁니다. 혼잡한 시간대의 승강장은 다른 상황이고, 열차 안은 붐비든 아니든 다른 상황입니다.
이 글 대부분을 관통하는 감각과 같습니다. 규칙집이 아니라 주변을 한 번 보는 것입니다.
실용적으로 정리하면 위의 모든 설명보다 짧습니다. 배고프면 역에서 드세요. 역이 그러라고 되어 있습니다. 개찰구 전에 사고, 앉아서, 다 먹고 타면 됩니다. 체인점과 델리만쥬 매대를 합치면 웬만한 역에는 뭐라도 있고 값도 쌉니다. 문제가 생기는 건 이동하면서 먹으려 할 때입니다.
열차 안은 다릅니다. 뚜껑이 닫힌 병이나 텀블러 정도가 현실적인 한계입니다. 먹는 행위는 사실상 하지 않습니다. 과태료가 있는 금지가 아니라 그냥 아무도 안 하는 일이고, 그래서 하면 눈에 띕니다.
코로나 이후로 더 굳어졌고 다시 풀리지 않았습니다. 열차에서 김밥을 먹었다는 옛날 이야기를 봤다면, 그 시절은 지났습니다.
버스는 예절이 아니라 규정입니다. 서울시 조례에 따라 개방된 일회용 용기에 담긴 음식물을 들고 있으면 기사가 승차를 거부할 수 있습니다(서울특별시).
거부될 수 있음
들고 탈 수 있음
구멍 뚫린 뚜껑의 테이크아웃 커피
뚜껑 닫힌 플라스틱 병
종이컵에 담긴 떡볶이·간식
따지 않은 캔
포장이 뜯겼거나 새는 것
밀폐 텀블러, 보온병
상자에 포장된 치킨·피자
봉지에 담은 장 본 식재료
지하철에서는 괜찮던 컵이 버스 문 앞에서 발목을 잡을 수 있습니다. 타기 전에 다 마시거나, 뚜껑 있는 용기로 옮기세요.
판단은 기사에게 달려 있어 편차가 있습니다. 그냥 태워주는 경우도 있습니다. 다만 거부당할 가능성이 실재하고, 뒤에 줄이 선 상태로 문 앞에서 실랑이하는 걸로 이동을 시작하고 싶진 않을 겁니다.
노약자석에 앉지 마세요
각 객차 끝에 표시된 좌석은 노인·임산부·장애인을 위한 자리입니다. 객차가 꽉 차도 비어 있는 경우가 많습니다. 실수가 아니라 의도된 것이고, 해당하지 않는 사람이 앉으면 눈에 띕니다.
흐름을 막지 마세요
문 앞에 그대로 서 있기, 환승 통로에서 멈추기, 에스컬레이터 끝에서 서기, 개찰구 앞에서 머뭇거리기. 누구도 소리 내어 지적하지 않지만, 빠르게 움직이도록 만들어진 체계에서는 모두 마찰을 만듭니다.
휴대폰을 볼 일이 있으면 옆으로 비켜서세요.
통로는 지나가라고 만든 공간입니다. 가운데 노란 줄은 시각장애인 유도블록이라, 그 위에 멈춰 서면 안 되는 이유가 하나 더 있습니다.
2. 오래 머물면 마주치는 것
두 손
물건을 주고받을 때 — 돈, 카드, 술잔, 서류 — 두 손으로, 또는 한 손을 다른 손목에 받쳐서 건네면 예의로 읽힙니다. 한 손은 편한 사이의 방식이고, 손윗사람에게는 무성의하게 보입니다.
비용이 들지 않고 좋게 받아들여지니 익혀둘 만합니다. 틀렸다고 지적받을 일은 없습니다.
술 따르기
한국 사람들과 술을 마신다면 서로 따라줍니다. 자기 잔을 자기가 채우는 게 오히려 어색합니다. 손윗사람에게 따를 때는 병을 두 손으로 잡습니다.
실제로 금방 마주치는 상황이지만, 여행자끼리가 아니라 현지인과 마시는 경우에 한합니다.
신발 벗기
가정집, 게스트하우스, 좌식 좌석이 있는 일부 전통 식당, 템플스테이. 턱이 있고 신발장이 보이면 그게 신호입니다.
3. 아마 평생 마주치지 않을 것
여행 안내에 끊임없이 등장하지만, 짧게 다녀가는 방문자에게는 대부분 일어나지 않습니다.
자주 등장하는 것
왜 해당되지 않나
명함 예절
여행 중에 명함을 주고받지 않습니다
이름을 빨간 펜으로 쓰지 않기
누군가의 이름을 쓸 일이 없습니다
인사 각도와 시간
가볍게 목례면 충분합니다
나이에 따른 존댓말
영어로 말을 거는 쪽이 알아서 조절합니다
복잡한 음주 예법
현지인과 어울리게 되면 그때 누군가 알려줍니다
“어깨를 가리라”는 복장 조언
널리 반복되지만, 정작 시간을 보낼 동네에서는 낡은 이야기입니다
이런 것들을 언급하는 게 틀린 건 아닙니다. 한국 사회에 실재하는 부분입니다. 다만 당신의 여행을 채우는 내용이 아니고, 이걸 급한 일처럼 다루면 정작 중요한 것이 묻힙니다.
기준은 동네마다 다릅니다
대부분의 예절 안내는 한국을 하나의 장소처럼 씁니다. 그렇지 않고, 동네 간 격차가 그 목록들에 실린 나라 간 격차보다 큰 경우도 있습니다.
홍대는 한국에서 기준이 가장 느슨한 축에 속합니다. 젊은 층과 학생, 밤 문화가 중심인 지역이라, 안내서가 경고한 관습을 눈에 띄게 무시해도 아무 반응이 없습니다. 복장이 분명한 예입니다. 영문 여행 글에서 “어깨를 가리라”는 조언이 끝없이 돌지만, 이런 동네에서는 주변 사람들의 옷차림과 아예 맞지 않습니다.
같은 행동이 다른 자리에서는 다르게 읽힙니다. 사찰, 나이 지긋한 단골이 있는 오래된 식당, 지방의 작은 도시 — 홍대에 없는 기대가 있는 곳들입니다.
그래서 필요한 건 규칙집이 아니라 한 번 둘러보는 습관입니다. 주변 사람들이 하는 대로 맞추면 됩니다. 어느 동네에서나 통하고, 어느 규칙이 어디에 적용되는지 외울 필요도 없어집니다.
4. 의외로 놀라는 지점
아무도 당신이 이걸 알 거라고 기대하지 않습니다.
한국에는 방문자가 많고, 관광지의 직원들은 현지 관습을 모르는 사람들을 매일 상대합니다. 뭔가 틀려도 소동이 벌어지지 않습니다.
그 이상입니다. 처음의 실수는 거의 다 그냥 넘어갑니다. 한국 사람들은 대체로 이런 데 관대합니다. 인사 타이밍이 어긋났다고, 자기 잔을 자기가 채웠다고, 한 손으로 건넸다고 점수를 매기는 사람은 없습니다.
선은 규칙집이 아니라 무례함입니다. 관습을 틀리는 건 별말 없이 지나갑니다. 앞사람을 무시하거나, 양보받지 않은 자리를 차지하거나, 직원을 배경처럼 대하는 건 다릅니다. 그건 어디서든 티가 납니다. 그 선만 넘지 않으면 나머지는 거의 다 무리 없이 받아들여집니다.
그러니 실질적인 조언은 이렇습니다. 목록을 걱정하지 말고 그냥 움직이세요. 규칙을 떠올리느라 문 앞에서 머뭇거리는 쪽이 규칙을 어기는 것보다 더 많은 마찰을 만듭니다.
익혀둘 값어치가 있는 건 지하철과 버스 관련입니다. 주변 사람에게 영향을 주거나 실제로 승차를 막을 수 있기 때문입니다. 나머지는 마무리 손질입니다.
테이블에 맞는 방식으로 주문하고, 지하철에서 목소리를 낮추고, 팁을 두지 않으면 대부분 해결됩니다.
5. 한눈에
주문 방식은 테이블을 보고 판단 — 태블릿·QR·호출벨·없음. 알아봐 주기를 기다리지 마세요
어디서도 팁 없음
지하철에서는 조용히 — 통화·스피커폰 금물
배고프면 역에서 드세요. 개찰구 전에 사서 앉아 먹고 타면 됩니다. 열차 안은 밀폐 음료만
This guide is written in two parts. English first, Korean below. 이 글은 두 파트로 되어 있습니다. 영문이 먼저, 한국어가 아래에 있습니다.
PART 1 — ENGLISH
Most guides tell you to buy a T-money card and stop there. That was good advice five years ago. Now there are four realistic options, they do different things, and picking the wrong one costs you money or leaves you stranded at a gate.
Here is what each actually is, and how to choose in about a minute.
1. The four, in one table
What it is
Best for
T-money
Pay-as-you-go transit card
Almost everyone. The safe default
Climate Card (기후동행카드)
Unlimited-ride pass, Seoul only
Heavy riders staying inside Seoul
WOWPASS
Prepaid card + currency exchange, for foreigners
Arriving with foreign cash
NAMANE
Prepaid card, app top-up, for foreigners
Topping up from your phone
WOWPASS and NAMANE also work as transit cards, so they are not either/or with T-money — they replace it.
2. T-money — the default, and usually right
Buy it at any convenience store, load cash, tap on and off. It works on subway, bus, and taxis across the country, and as a payment card in convenience stores.
Choose it if you are staying under a week, moving at a normal pace, or travelling beyond Seoul. It is boring and it always works.
The only real downside is that you pay per ride.
3. Climate Card — powerful, but read the boundaries
Seoul’s unlimited-ride pass. Thirty days costs ₩62,000, or ₩55,000 for ages 13–39. There are also short-term passes of 1–7 days for ₩5,000–20,000, which is the version that actually fits a trip (Seoul Metropolitan Government).
What it covers: Seoul subway plus some Gyeonggi sections, Seoul-licensed city and village buses, Ttareungi public bikes, and the Hangang bus.
What it does not cover: Shinbundang Line, GTX, subway outside Seoul, express and airport buses, and buses licensed to other regions.
Two boundary rules matter more than the price:
Board inside the zone, alight outside it, and the card does not apply — you are charged separately at the gate. This catches people going to Suwon, Incheon or anywhere past the boundary.
Exception: alighting at Incheon Airport Terminal 1 or 2 on the airport railroad is allowed, as is the Line 7 Seokman–Kkachiul section.
That exception is genuinely useful — it means you can ride out to the airport on the pass — but do not generalise it. Everything else outside Seoul is chargeable.
And crossing the boundary costs more than money. When you alight outside the zone, the tap-out does not register. You settle the fare with a station attendant — but the system records a missed tap-out. Accumulate two missed tap-outs and the card is suspended for 24 hours (Seoul Metropolitan Government).
So two trips past the boundary can freeze your pass for a day, even though you paid the difference both times.
Know where your line stops. The boundary is not the Seoul city limit — it varies by line. On the Gyeongui-Jungang Line, for example, coverage runs from Korea Aerospace University to Tanhyeon (ten stations: Korea Aerospace University, Gangmae, Haengsin, Neunggok, Daegok, Goksan, Baengma, Pungsan, Ilsan, Tanhyeon). Continue toward Geumchon or Munsan and you are outside it.
Seoul runs a coverage lookup — check your line before you rely on the pass.
One restriction specific to visitors: foreigners can use the physical card only. The mobile version is not available to you.
Choose it if you are staying in Seoul, riding a lot, and your trip length matches a short-term pass. Otherwise T-money is cheaper.
And if you buy one, read our tap-out guide first. Missing the tap-out twice suspends the card for 24 hours — a penalty that does not exist on a normal card.
4. WOWPASS — for arriving with cash
A prepaid card aimed at foreign visitors, with one distinctive feature: you feed foreign banknotes into a machine and it converts and loads them in won, with no separate exchange fee. Kiosks sit in airports and major stations.
It doubles as a transit card and a payment card.
Choose it if you are bringing cash and would otherwise queue at an exchange counter. The convenience is real.
Be aware the kiosks are concentrated in central locations. If you run low somewhere without one, you need to get to one.
5. NAMANE — for topping up from your phone
Also a prepaid card for foreigners, but it takes a different approach to loading. You cannot insert foreign banknotes. You top up with Korean cash at CU convenience stores or station machines, or by credit card through the app.
Choose it if you would rather top up from your phone wherever you are than find a specific kiosk.
The trade-off is the mirror image of WOWPASS: more flexible topping up, no built-in currency exchange.
6. Choosing in one minute
Your trip
Take
Under a week, normal pace
T-money
Staying in Seoul, riding constantly, 1–7 days
Climate Card short-term pass
Travelling outside Seoul at all
T-money — the Climate Card stops at the boundary
Arriving with foreign cash to change
WOWPASS
Want to top up from your phone anywhere
NAMANE
Not sure
T-money. It is never the wrong answer, only sometimes not the cheapest
7. Before you buy
T-money is the safe default. The others are optimisations, not upgrades
Climate Card has 1–7 day passes — do not assume it is only the ₩62,000 monthly
Climate Card stops at the Seoul boundary. Going to Suwon or Incheon? You pay separately
Exception: riding to Incheon Airport Terminal 1 or 2 is covered
Crossing the boundary registers a missed tap-out — two of those suspend the card for 24 hours
Check your line’s boundary. Gyeongui-Jungang, for instance, covers only as far as Tanhyeon
Foreigners can use the Climate Card as a physical card only
Climate Card penalises missed tap-outs with a 24-hour suspension — see the tap-out guide
WOWPASS converts foreign cash at a kiosk; NAMANE tops up via app. Pick by how you will add money
PART 2 — 한국어
대부분의 가이드는 “T-money를 사세요”라고 하고 끝냅니다. 5년 전이면 맞는 조언이었습니다. 지금은 현실적인 선택지가 넷이고, 하는 일이 서로 다르며, 잘못 고르면 돈을 더 쓰거나 개찰구 앞에서 막힙니다.
각각이 실제로 무엇인지, 그리고 1분 안에 고르는 법을 정리했습니다.
1. 네 가지를 한 표로
무엇인가
이런 사람에게
T-money
충전식 교통카드
거의 모든 사람. 무난한 기본값
기후동행카드
무제한 정기권, 서울 한정
서울 안에서 많이 타는 사람
WOWPASS
외국인용 선불카드 + 환전
외화 현금을 들고 온 사람
NAMANE
외국인용 선불카드, 앱 충전
폰으로 충전하고 싶은 사람
WOWPASS와 NAMANE도 교통카드 기능이 있어서, T-money와 둘 다 살 필요는 없습니다. 대체하는 관계입니다.
2. T-money — 기본값이고, 대개 정답입니다
편의점 어디서나 사고, 현금을 충전하고, 타고 내릴 때 대면 됩니다. 전국의 지하철·버스·택시에서 쓰이고 편의점 결제도 됩니다.
이런 경우 선택하세요: 일주일 미만 체류, 평범한 이동량, 또는 서울 밖으로 나가는 일정. 지루하지만 언제나 작동합니다.
유일한 단점은 탈 때마다 요금을 낸다는 것입니다.
3. 기후동행카드 — 강력하지만 경계선을 읽어야 합니다
서울의 무제한 정기권입니다. 30일권이 62,000원, 만 13~39세는 55,000원입니다. 그리고 1~7일 단기권이 5,000~20,000원으로 따로 있는데, 여행에 실제로 맞는 건 이쪽입니다(서울특별시).
포함되는 것: 서울지역 지하철과 일부 경기도 구간, 서울시 면허 시내·마을버스, 따릉이, 한강버스.
제외되는 것: 신분당선, GTX, 서울지역 외 지하철, 광역·공항버스, 타 지역 면허버스.
가격보다 중요한 경계 규칙이 둘 있습니다.
범위 안에서 타고 범위 밖에서 내리면 적용되지 않습니다. 개찰구에서 별도 요금이 부과됩니다. 수원이나 인천처럼 경계를 넘는 경우가 여기 걸립니다.
This guide is written in two parts. English first, Korean below. 이 글은 두 파트로 되어 있습니다. 영문이 먼저, 한국어가 아래에 있습니다.
PART 1 — ENGLISH
You tapped your card getting on the bus. You get off through the back door and walk away.
In most cities that is the whole transaction. In Seoul it costs you money — and if you bought a Climate Card, it can lock you out of the transit system for a full day.
This one takes ten seconds to get right and almost nobody tells visitors about it.
1. The rule
Tap your card again when you get off the bus. There is a reader by the rear door. Hold your card to it as you step down.
That is it. That is the whole rule. But the consequences of forgetting differ depending on which card you are holding, and one of them is much worse than the other.
2. With a normal transit card
If you do not tap out, the system has no record that you left the bus. As far as it knows, you are still on board.
So when you board your next bus or enter the subway, that is not treated as a transfer. It is a fresh journey at full fare — you lose the transfer discount and pay a new base fare.
Seoul’s official guidance is direct about it: skipping the tap-out breaks the transfer chain, and the uncharged amount is collected on your next boarding (Seoul Metropolitan Government).
There is a second cost on longer routes. Buses that run beyond the city charge by distance — the base fare covers the first 10 km, then roughly ₩100 per additional 5 km. Without a tap-out the system cannot calculate your distance, so it cannot bill you correctly, and the correction lands on your next trip.
3. With a Climate Card — this is the one that hurts
The Climate Card (기후동행카드) is Seoul’s unlimited-ride pass. Because it is unlimited, the system cannot punish a missed tap-out by charging you more. There is nothing to charge.
So it does something else instead.
Miss the tap-out twice during your pass period and the card is suspended for 24 hours, counted from the moment you boarded on the second missed tap. — Seoul Metropolitan Government
Read that again if you bought one. Two careless exits and your unlimited pass stops working for a full day — probably a day you had plans for.
It is not two in a row. It is two cumulative, across the whole validity period of the card.
There is a second way to trigger it that has nothing to do with forgetting. The Climate Card only works inside a defined zone, and the boundary is not the Seoul city limit — it varies by line. Ride past it and the tap-out will not register even if you present your card. You settle the difference with a station attendant, but the system logs a missed tap-out anyway. Two such trips and the card is suspended.
On the Gyeongui-Jungang Line, for instance, coverage ends at Tanhyeon. Continue toward Geumchon or Munsan and you are outside the zone. Check your line in our transit card comparison before relying on the pass.
4. What about the subway?
On the subway you tap through a gate to get out, so there is nothing to forget. The gate will not open otherwise.
The problem is buses specifically, because you can physically walk off without tapping. The transfer discount runs both ways — subway to bus and bus to subway — so a missed bus tap-out also breaks a transfer into the subway.
5. How to not get caught
Tap out every single time you leave a bus. Not just when transferring — every time. The system cannot read your intentions
The reader is by the rear door. Tap as you step down
Listen for the beep. A successful tap makes a sound. No beep means it did not register — try again before the doors close
If you are getting off at a crowded stop, have your card out before you reach the door rather than digging for it in the doorway
If you are on a Climate Card, treat this as non-negotiable. The penalty is a lost day, not a lost ₩1,500
6. Quick reference
Normal transit card
Climate Card
Miss one tap-out
Lose transfer discount, pay new base fare
Warning territory — one more and you are out
Miss two
Same, each time
Card suspended 24 hours
Long-distance routes
Distance fare corrected on next trip
—
Where to tap
Rear door reader
Rear door reader
PART 2 — 한국어
버스를 탈 때 카드를 찍었습니다. 뒷문으로 내려서 그냥 걸어갑니다.
대부분의 도시에서는 그걸로 끝입니다. 서울에서는 돈이 나갑니다. 그리고 기후동행카드를 샀다면 하루 종일 대중교통을 못 쓰게 될 수도 있습니다.
10초면 되는 일인데, 외국인 안내에는 거의 나오지 않습니다.
1. 규칙
버스에서 내릴 때 카드를 한 번 더 대세요. 뒷문 옆에 단말기가 있습니다. 내리면서 카드를 갖다 대면 됩니다.
그게 전부입니다. 다만 잊었을 때의 결과가 카드 종류에 따라 다르고, 한쪽은 훨씬 심각합니다.
2. 일반 교통카드인 경우
하차 태그를 안 하면 시스템은 당신이 버스에서 내렸다는 기록을 갖지 못합니다. 시스템이 보기엔 아직 타고 있는 상태입니다.
그래서 다음 버스를 타거나 지하철에 들어갈 때 그것은 환승으로 처리되지 않습니다. 새로운 이용으로 계산되고, 환승 할인을 잃고 기본요금이 다시 부과됩니다.
서울시 안내도 이 점을 분명히 밝히고 있습니다. 하차 미태그 시 환승이 단절되며, 미징수 금액은 다음 수단 승차 시 징수됩니다(서울특별시).
장거리 노선에는 비용이 하나 더 붙습니다. 시외를 함께 운행하는 버스는 거리로 요금을 매기는데, 기본요금이 10km까지이고 이후 5km마다 100원가량이 추가됩니다. 하차 태그가 없으면 거리를 계산할 수 없어 정산이 다음 이용으로 넘어갑니다.
3. 기후동행카드 — 이쪽이 진짜 문제입니다
기후동행카드는 무제한 정기권입니다. 무제한이기 때문에 하차 태그를 놓쳐도 요금을 더 물릴 수가 없습니다. 물릴 요금이 없으니까요.
그래서 다른 방식으로 제재합니다.
사용기간 중 하차태그를 2회 이상 미실시하면, 두 번째 미태그 승차 시간을 기준으로 24시간 동안 사용이 중지됩니다. — 서울특별시
기후동행카드를 샀다면 다시 읽어보세요. 두 번 무심코 내리면 무제한 카드가 하루 종일 멈춥니다. 하필 일정이 있는 날일 가능성이 높고요.
연속 2회가 아니라 카드 사용기간 전체에서 누적 2회입니다.
깜빡하는 것과 무관하게 걸리는 경로가 하나 더 있습니다. 기후동행카드는 정해진 범위 안에서만 작동하고, 그 경계는 서울시 행정구역과 다르며 노선마다 다릅니다. 범위를 넘어가면 카드를 대도 하차 태그가 되지 않습니다. 역무원에게 차액을 정산하지만 시스템에는 미태그로 기록됩니다. 그런 이동을 두 번 하면 카드가 정지됩니다.
예를 들어 경의중앙선은 탄현역까지가 범위입니다. 금촌이나 문산 방향으로 더 가면 범위 밖입니다. 정기권에 의존하기 전에 교통카드 비교 글에서 자기 노선을 확인하세요.
4. 지하철은요?
지하철은 나갈 때 개찰구에 태그해야 문이 열리므로 잊을 수가 없습니다.
문제는 버스입니다. 태그하지 않고도 그냥 내릴 수 있으니까요. 그리고 환승 할인은 양방향으로 적용되므로 — 지하철에서 버스로, 버스에서 지하철로 — 버스 하차 태그를 놓치면 지하철로 이어지는 환승도 끊깁니다.
5. 놓치지 않는 법
버스에서 내릴 때는 매번 태그하세요. 환승할 때만이 아니라 항상입니다. 시스템은 의도를 읽지 못합니다
단말기는 뒷문 옆에 있습니다. 내리면서 대세요
소리를 확인하세요. 정상 처리되면 소리가 납니다. 소리가 안 나면 인식되지 않은 것이니 문이 닫히기 전에 다시 대세요
사람이 많은 정류장에서 내린다면 문 앞에서 카드를 찾지 말고 미리 손에 들고 계세요
기후동행카드 사용자라면 선택의 문제가 아닙니다. 잃는 것이 1,500원이 아니라 하루입니다
The surprise for most visitors is that public transit directions do work. Seoul Metro publishes open transit data, so Google’s subway routing is reasonably accurate. If you want to know which line to take from Hongdae to Gangnam, Google Maps will tell you.
What it will not do is walk you there — and the way it fails is worth seeing, because it is not subtle.
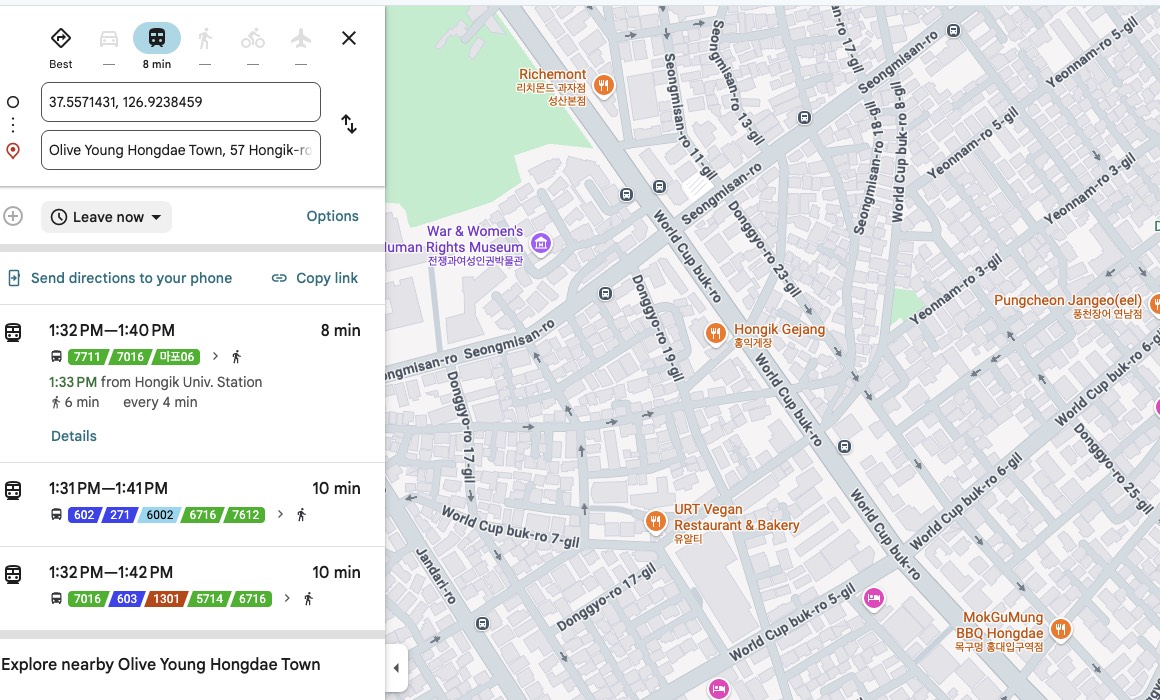
Ask for directions between two points in Seoul and look at the row of travel modes across the top. Transit shows a time. Driving, walking and cycling show a dash. Those three are simply not calculated. You do not get a bad route; you get no route.
The mode row, close up. Transit returns 8 minutes; driving, walking and cycling each return a dash — those three are simply never calculated here.
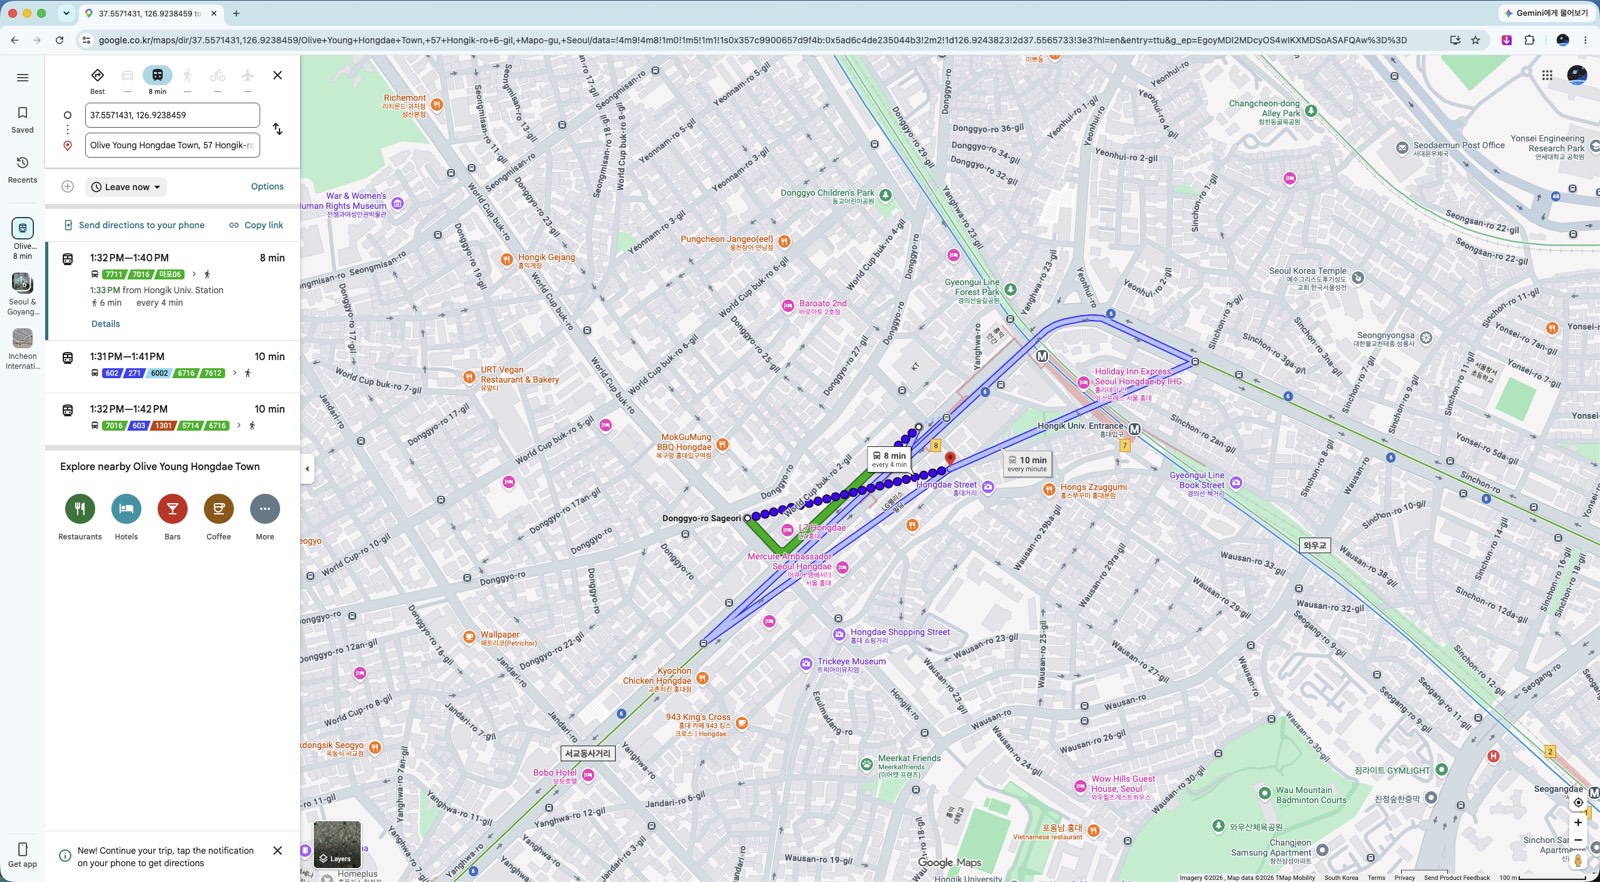
The give-away is what Google offers instead. Put in a destination a few hundred metres away and every suggestion that comes back is a bus — and most of the quoted journey time is spent walking to the stop and away from it again, for a distance you could have covered on foot without stopping. Not one of the alternatives says “walk.” Google is not being obtuse. Transit is the only mode it is allowed to compute, so transit is the only answer it has.
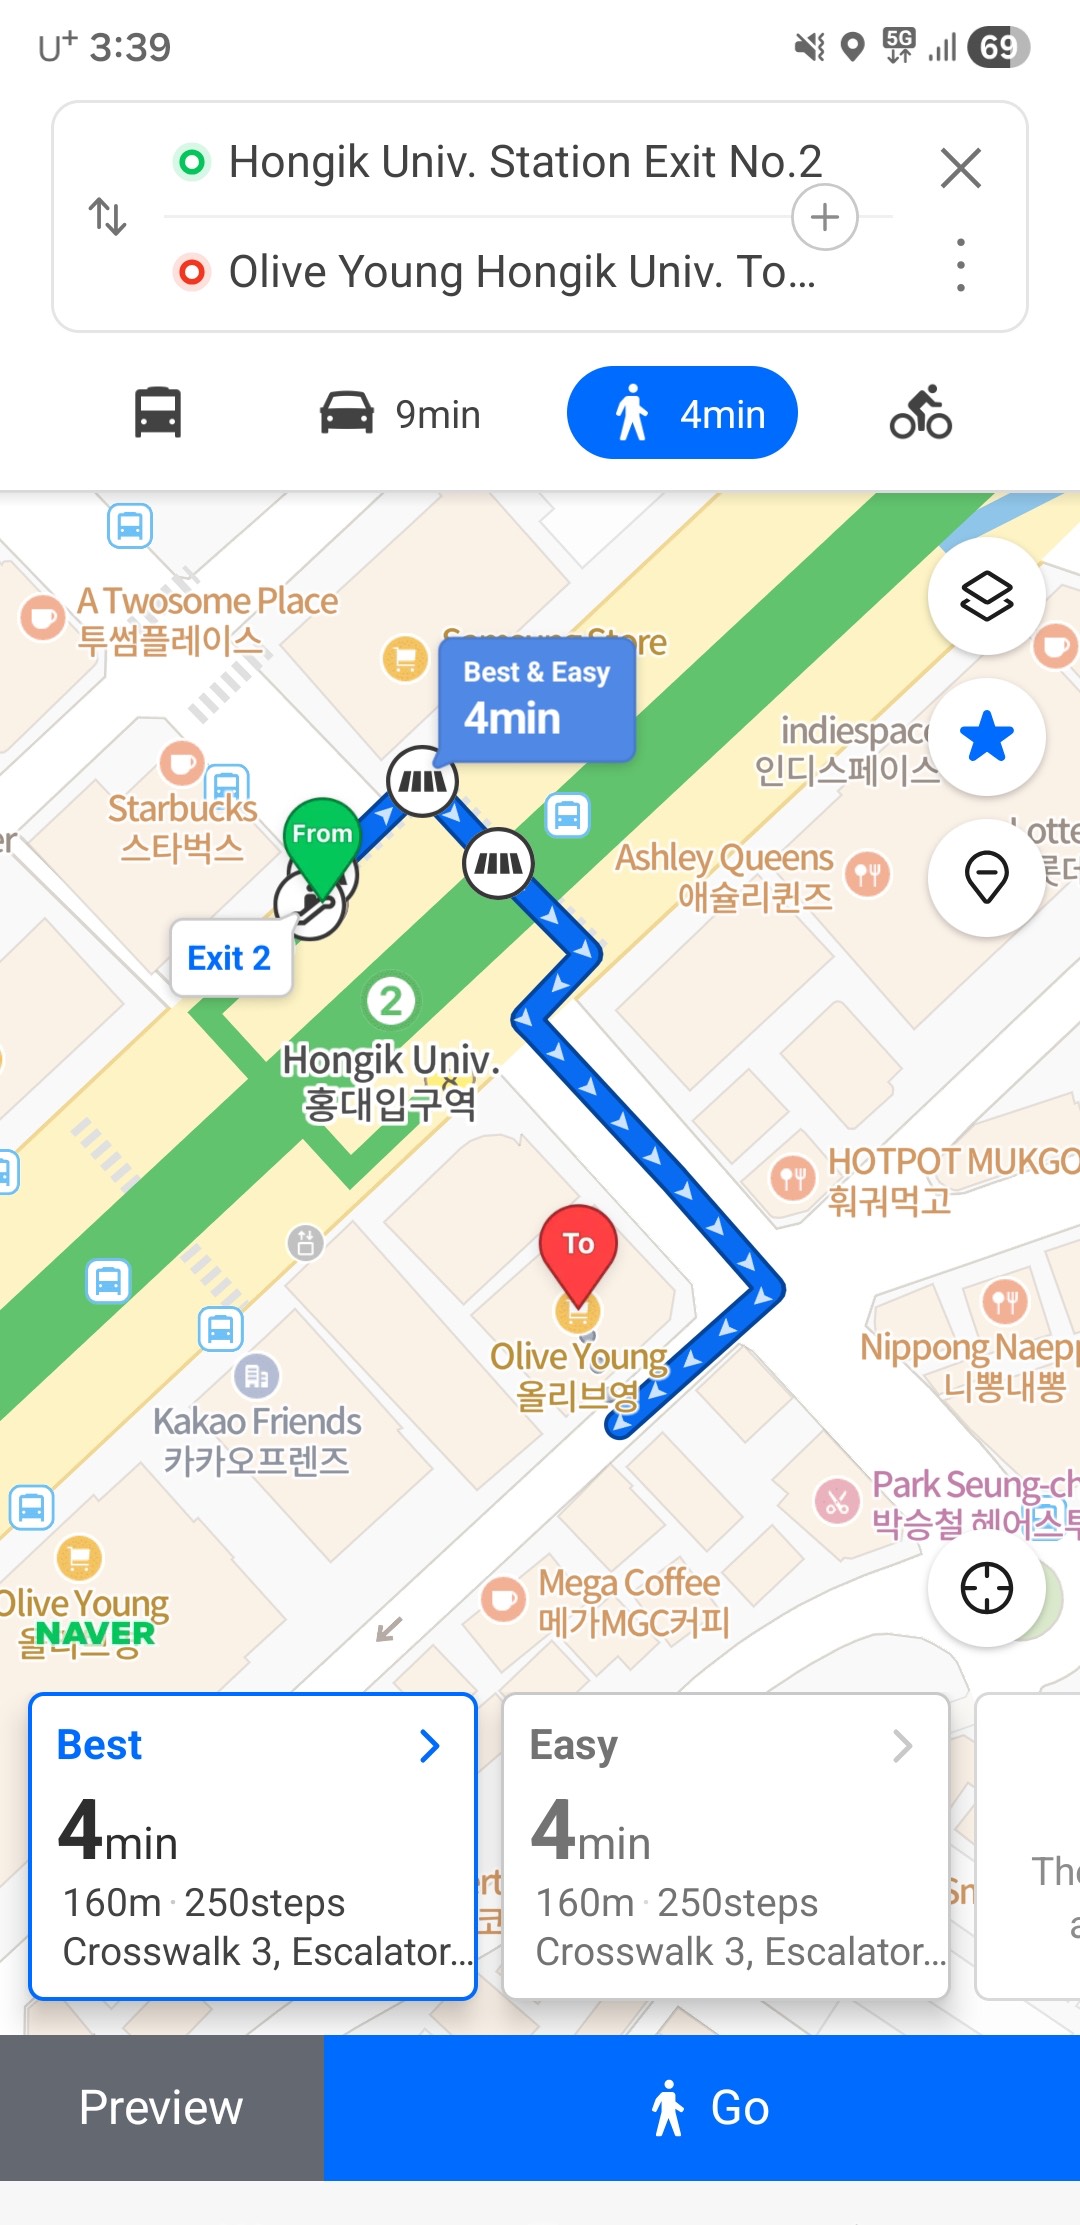
The same kind of trip in Naver Map, in English: 4 minutes, 160 metres, 250 steps, turn by turn. This is the feature Google cannot offer here — not a worse version of it, the whole thing.The same search in full. Hongik Univ. Station to Olive Young Hongdae Town — every option Google returns is a bus, and six of the eight minutes are spent walking anyway.
Inside a transit route the same gap appears. The walking legs — station exit to your destination — come with no step-by-step guidance.
That last part matters more than it sounds. Korean subway stations often have a dozen or more exits spread across several blocks. Coming out of the wrong one can mean a fifteen-minute correction.
Exit numbers are signposted clearly — but only once you are already inside the station. What Google Maps will not tell you is which number to aim for, and that is exactly where the missing walking directions cost you.
One more thing the apps will not warn you about: on buses you have to tap your card again when getting off. Skip it and you lose the transfer discount — see the tap-out rule.
2. Why it doesn’t work
Korean law restricts exporting high-precision map data to servers outside the country. Google has served Korean maps from domestic servers since 2008, but the features that need Google’s own processing — walking directions, turn-by-turn navigation — were never possible under that arrangement.
Google’s position is that routing requires “the enormous computing power of data centers distributed around the world,” which is why exporting the data is necessary rather than optional (Google Korea Q&A, August 2025).
Worth noting: the data Google asked for is the 1:5000 national base map — already cleared through security review and already used by Naver and Kakao. The dispute was never about whether the data is secret.
3. What changed in February 2026 — and what didn’t
On February 27, 2026, an inter-agency committee under the National Geographic Information Institute approved conditional export of the 1:5000 high-precision map, closing an argument that had run for 18 years (ZDNet Korea).
The committee included the Ministry of Land, the Ministry of National Defense, the National Intelligence Service, the Ministry of Foreign Affairs, and several others. Approval came with security conditions: imagery processing, restrictions on coordinate display, and continued use of domestic servers. The permission is limited to navigation and routing (Byline Network).
Headlines at the time read like the problem was solved. It is not, yet.
As of August 2026 — roughly six months after approval — walking and driving navigation still are not available in Google Maps in Korea, and no launch date has been announced.
So if you read in February that Google Maps now works in Korea, that was permission being granted, not a feature shipping. Plan your trip on the assumption that it still does not work. If it launches while you are here, that is a bonus.
4. Naver Map — install this one
If you install one app, make it Naver Map. It has the strongest English support of the Korean options, accurate walking directions, and the most complete business listings — hours, photos, reviews, and which exit to use.
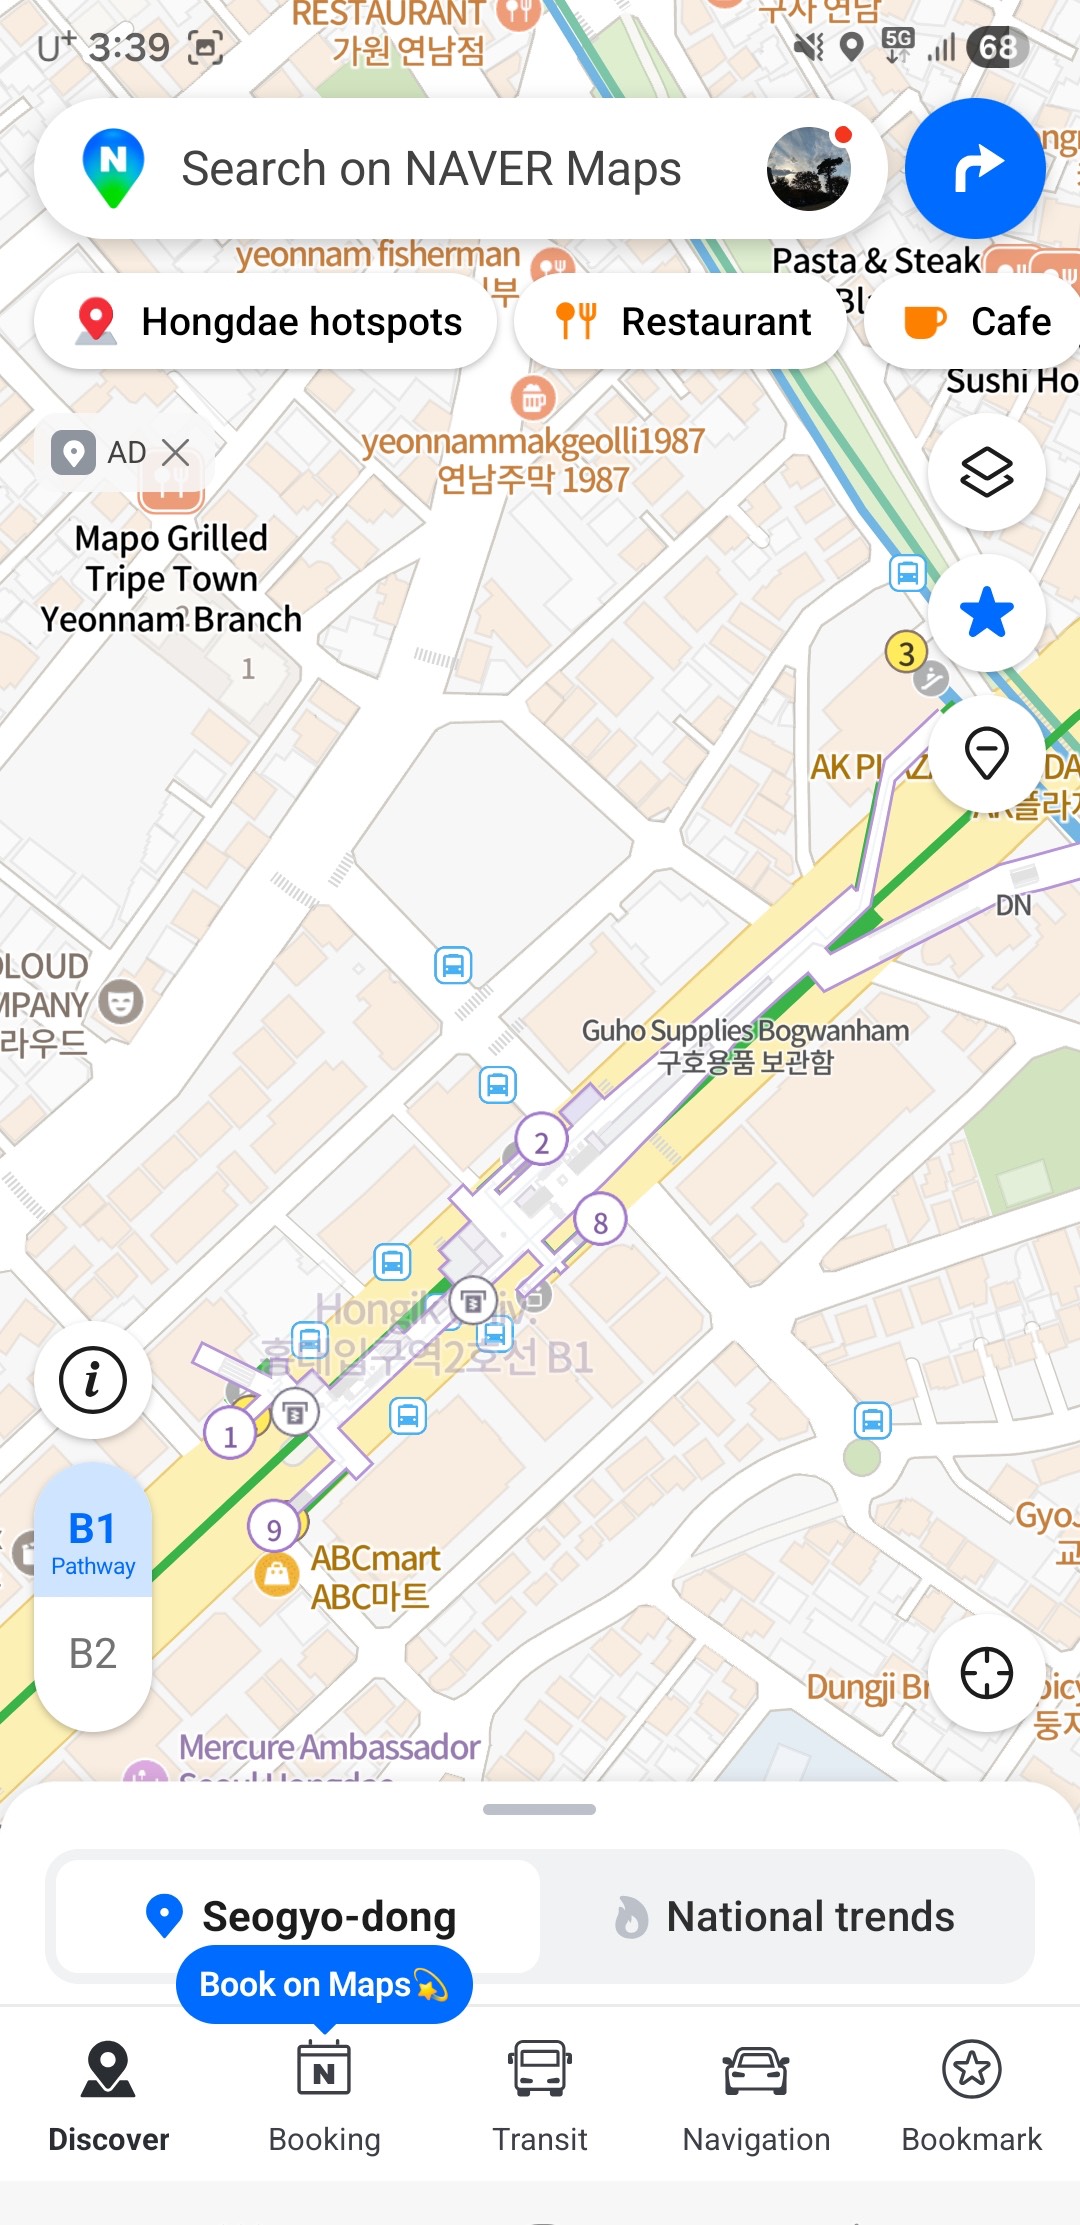
What the app looks like once it is in English. If you have been putting this off because you expected a wall of Korean, this is the actual screen.
It is probably already in English. Naver Map follows your phone’s language setting, so if your device is in English the app opens that way — no setup needed. Open it and check before hunting through menus.
If it opened in Korean, switch it:
Tap the menu icon (☰) in the top-left
Tap the gear icon (⚙️) to open settings
Find 언어 (Language) and choose English
The app restarts in English — buttons, directions, and station names
On desktop, go to map.naver.com, click the profile icon, and choose English in settings.
(App layouts change with updates. If the icons have moved, look for the gear first, then the language entry.)
Two things worth knowing:
You do not need an account. When a login screen appears, tap Skip or use Guest Mode. All core navigation works without a Korean phone number.
Place names often show in both Korean and English. This is deliberate and useful — you can show the Korean name to a taxi driver or shop staff.
The limits: some reviews and smaller place names stay in Korean, and offline use is limited. Real-time navigation and transit need a connection.
5. Kakao Map — the backup
KakaoMap covers driving, walking, cycling, and public transit, and locals use it heavily. Its transit routing is as good as Naver’s.
Its English support is weaker than Naver’s, so as a visitor it is harder to lean on as your only app.
Where it earns its place on your phone: as a second opinion. Map apps disagree — about which exit is closest, whether a small shop is still open, how a complicated transfer actually works. When Naver gives you something that looks wrong, checking Kakao takes ten seconds.
If you are only installing one app, install Naver. If you have room for two, this is the second.
6. Before you arrive
Install Naver Map before you fly — download over your home wifi, not airport data
Switch it to English: ☰ → ⚙️ → 설정 → 언어 → English
Skip the login. No Korean phone number needed
Consider KakaoMap as a backup for cross-checking
Google Maps is still fine for subway routes — keep it, just do not rely on it to walk you anywhere
Do not assume the February 2026 approval means navigation works. Check on arrival; as of August 2026 it does not
PART 2 — 한국어
한국의 구글 지도에 대해 흔히 듣는 말이 두 가지 있고, 둘 다 정확하지 않습니다.
첫째, “한국에서는 구글 지도가 안 된다.” 됩니다. 다만 가장 필요한 기능이 안 될 뿐입니다.
둘째, “2026년 2월에 해결됐다.” 정부가 허가한 것은 맞습니다. 서비스는 아직 시작되지 않았습니다.
2026년 8월 기준으로 정확한 상황과, 입국 전에 무엇을 준비해야 하는지 정리합니다.
1. 되는 것과 안 되는 것
한국에서 구글 지도가 백지로 나오지는 않습니다. 대부분은 정상적으로 작동합니다.
됨
안 됨
지도 보기
도보 길찾기 (단계별 안내)
장소 검색
자동차 내비게이션
리뷰·사진·영업시간
자전거 길찾기
지하철·버스 경로
대중교통 경로 안의 도보 구간 안내
대부분의 방문자가 의외로 여기는 지점은 대중교통 길찾기가 된다는 것입니다. 서울교통공사가 공개 교통 데이터를 제공하기 때문에 지하철 경로는 상당히 정확합니다. 홍대에서 강남까지 어느 노선을 타야 하는지는 구글 지도가 알려줍니다.
하지만 걸어서 데려다주지는 않습니다. 그리고 실패하는 방식이 꽤 노골적입니다.
서울 안에서 두 지점을 놓고 길찾기를 하면 화면 위쪽 이동수단 줄을 보세요. 대중교통에만 시간이 나오고 자동차·도보·자전거는 대시(—)입니다. 계산 자체를 하지 않습니다. 부정확한 경로가 나오는 게 아니라 아예 경로가 없습니다.
이동수단 줄 확대. 대중교통만 8분이 나오고 자동차·도보·자전거는 모두 대시입니다. 이 셋은 한국에서 아예 계산되지 않습니다.
결정적인 건 대신 내놓는 답입니다. 몇백 미터 거리를 넣으면 돌아오는 안내가 전부 버스이고, 그 소요시간의 상당 부분이 정류장까지 걸어가고 내려서 다시 걸어가는 시간입니다. 그냥 쉬지 않고 걸으면 되는 거리인데도요. 대안 중 어느 것도 “걸으세요”라고 하지 않습니다. 구글이 어리석은 게 아니라, 계산할 수 있는 유일한 수단이 대중교통이라 그 답밖에 못 내놓는 것입니다.
같은 성격의 이동을 네이버지도에서 본 화면입니다. 영문으로 4분, 160m, 250걸음, 단계별 안내까지 나옵니다. 구글이 한국에서 제공하지 못하는 기능이 바로 이것입니다.같은 검색의 전체 화면. 홍대입구역에서 올리브영 홍대 타운까지 — 돌아온 안내가 전부 버스이고, 8분 중 6분이 어차피 걷는 시간입니다.
대중교통 경로 안에서도 같은 구멍이 생깁니다. 지하철 출구에서 목적지까지의 도보 구간에는 단계별 안내가 없습니다.
이 마지막 부분이 생각보다 중요합니다. 한국 지하철역은 출구가 열 개를 넘고 여러 블록에 흩어져 있는 경우가 많습니다. 잘못된 출구로 나오면 15분을 되돌아가야 할 수도 있습니다.
출구 번호는 역 안에서는 잘 표시돼 있습니다. 문제는 구글 지도가 몇 번 출구로 나가야 하는지를 알려주지 않는다는 점이고, 도보 안내의 부재가 실제로 손해를 끼치는 지점이 바로 여기입니다.
지도 앱이 알려주지 않는 것이 하나 더 있습니다. 버스는 내릴 때도 카드를 대야 합니다. 놓치면 환승 할인을 잃습니다 — 하차 태그 규칙에 정리했습니다.
2. 왜 안 되나
한국 법은 정밀 지도 데이터를 국외 서버로 반출하는 것을 제한합니다. 구글은 2008년부터 국내 서버를 통해 한국 지도를 서비스해 왔지만, 구글 자체 연산이 필요한 기능 — 도보 길찾기, 턴바이턴 내비게이션 — 은 그 구조에서 제공할 수 없었습니다.
구글의 설명은 길찾기가 “전 세계에 분산된 데이터센터의 막대한 컴퓨팅 파워”를 필요로 하기 때문에 반출이 선택이 아니라 필수라는 것입니다(구글코리아 Q&A, 2025년 8월).
짚어둘 점은, 구글이 요청한 데이터가 1:5000 국가기본도라는 사실입니다. 이미 보안심사를 통과한 공개 데이터이고 네이버와 카카오도 쓰고 있습니다. 이 논쟁은 데이터가 비밀이냐 아니냐의 문제가 아니었습니다.
3. 2026년 2월에 바뀐 것, 그리고 아직 안 바뀐 것
2026년 2월 27일, 국토지리정보원 산하 협의체가 1:5000 고정밀 지도의 조건부 국외반출을 허가하면서 18년간 이어진 논쟁이 마무리됐습니다(ZDNet Korea).
협의체에는 국토교통부, 국방부, 국가정보원, 외교부 등 관계 부처가 참여했습니다. 허가에는 영상 보안처리, 좌표 표시 제한, 국내 서버 활용이라는 조건이 붙었고, 범위는 내비게이션·길찾기로 한정됐습니다(바이라인네트워크).
당시 기사 제목만 보면 문제가 해결된 것처럼 읽힙니다. 아직 아닙니다.
2026년 8월 현재, 허가로부터 약 6개월이 지났지만 구글 지도의 도보·자동차 길찾기는 여전히 제공되지 않으며 서비스 개시 일정도 발표되지 않았습니다.
2월에 “이제 한국에서 구글 지도가 된다”는 기사를 봤다면, 그건 허가가 났다는 뜻이지 기능이 나왔다는 뜻이 아닙니다. 아직 안 된다는 전제로 여행을 계획하세요. 머무는 동안 시작되면 그건 덤입니다.
4. 네이버지도 — 이건 꼭 까세요
하나만 설치한다면 네이버지도입니다. 한국 앱 중 영어 지원이 가장 낫고, 도보 안내가 정확하며, 업체 정보(영업시간·사진·리뷰·출입구)가 가장 충실합니다.
영어로 전환한 뒤의 화면입니다. 한글투성이일까 봐 미뤄뒀다면, 실제로 보게 될 화면은 이것입니다.
대개는 이미 영어로 열립니다. 네이버지도는 휴대폰의 언어 설정을 따라가므로, 기기가 영어로 되어 있다면 앱도 영어로 실행됩니다. 메뉴를 뒤지기 전에 먼저 열어 확인해 보세요.
한국어로 열렸다면 이렇게 바꿉니다.
왼쪽 위 메뉴 아이콘(☰) 을 누릅니다
톱니바퀴 아이콘(⚙️) 을 눌러 설정으로 들어갑니다
언어 항목에서 English 를 선택합니다
앱이 다시 시작되면서 버튼·길안내·역 이름이 영어로 바뀝니다
PC에서는 map.naver.com에 접속해 프로필 아이콘을 누르고 설정에서 English를 고르면 됩니다.
(앱 화면은 업데이트로 바뀝니다. 아이콘 위치가 다르면 톱니바퀴를 먼저 찾고 그 안에서 언어 항목을 찾으세요.)
알아두면 좋은 두 가지
계정이 필요 없습니다. 로그인 화면이 나오면 건너뛰기나 게스트 모드를 누르세요. 한국 전화번호 없이도 길찾기 기능은 모두 쓸 수 있습니다.
장소 이름이 한국어와 영어로 함께 표시됩니다. 의도된 설계이고 유용합니다. 택시 기사나 가게 직원에게 한국어 이름을 그대로 보여줄 수 있습니다.
한계도 있습니다. 일부 리뷰와 작은 장소 이름은 한국어로 남고, 오프라인 사용은 제한적입니다. 실시간 길안내와 대중교통 정보는 인터넷 연결이 필요합니다.
5. 카카오맵 — 보조용
카카오맵은 자동차·도보·자전거·대중교통을 모두 지원하고 현지인이 많이 씁니다. 대중교통 경로는 네이버지도만큼 좋습니다.
다만 영어 지원이 네이버지도보다 약합니다. 외국인이 이것만 붙들고 다니기에는 어렵습니다.
그럼에도 깔아둘 값어치는 두 번째 의견에 있습니다. 지도 앱은 서로 다른 답을 줄 때가 있습니다. 어느 출구가 가까운지, 작은 가게가 아직 영업 중인지, 복잡한 환승이 실제로 어떻게 되는지에서요. 네이버지도가 이상한 답을 줄 때 카카오맵으로 확인하는 데 10초면 됩니다.
하나만 깐다면 네이버지도, 두 개를 깔 여유가 있다면 그다음이 이것입니다.
6. 도착 전 체크리스트
네이버지도를 출국 전에 설치하세요 — 공항 데이터 말고 집 와이파이에서
영어로 전환: ☰ → ⚙️ → 설정 → 언어 → English
로그인은 건너뛰세요. 한국 전화번호가 필요 없습니다
카카오맵은 교차 확인용 보조로 고려
구글 지도는 지하철 경로용으로는 계속 쓸 만합니다 — 다만 걸어서 안내받을 생각은 마세요
2026년 2월 허가가 곧 서비스 개시는 아닙니다. 도착해서 확인해 보되, 2026년 8월 기준으로는 아직 안 됩니다